I built Ghost in the Net’s narrative systems in Twine.
The state behind the story: what the variables track, where each one is written and where it is read, and how the minigames and styling are put together in SugarCube.
- 504
- Passages
- 70
- Story variables
- 132
- Stat checks (INT, TECH, BODY)
- 256
- Conditions in total
The map shows how the story passages connect.
Every passage of the Turkish build, placed where it sits in Twine and turned on its side so the run reads left to right. 504 passages and more than 750 links. The coloured ones are where variables do their work.
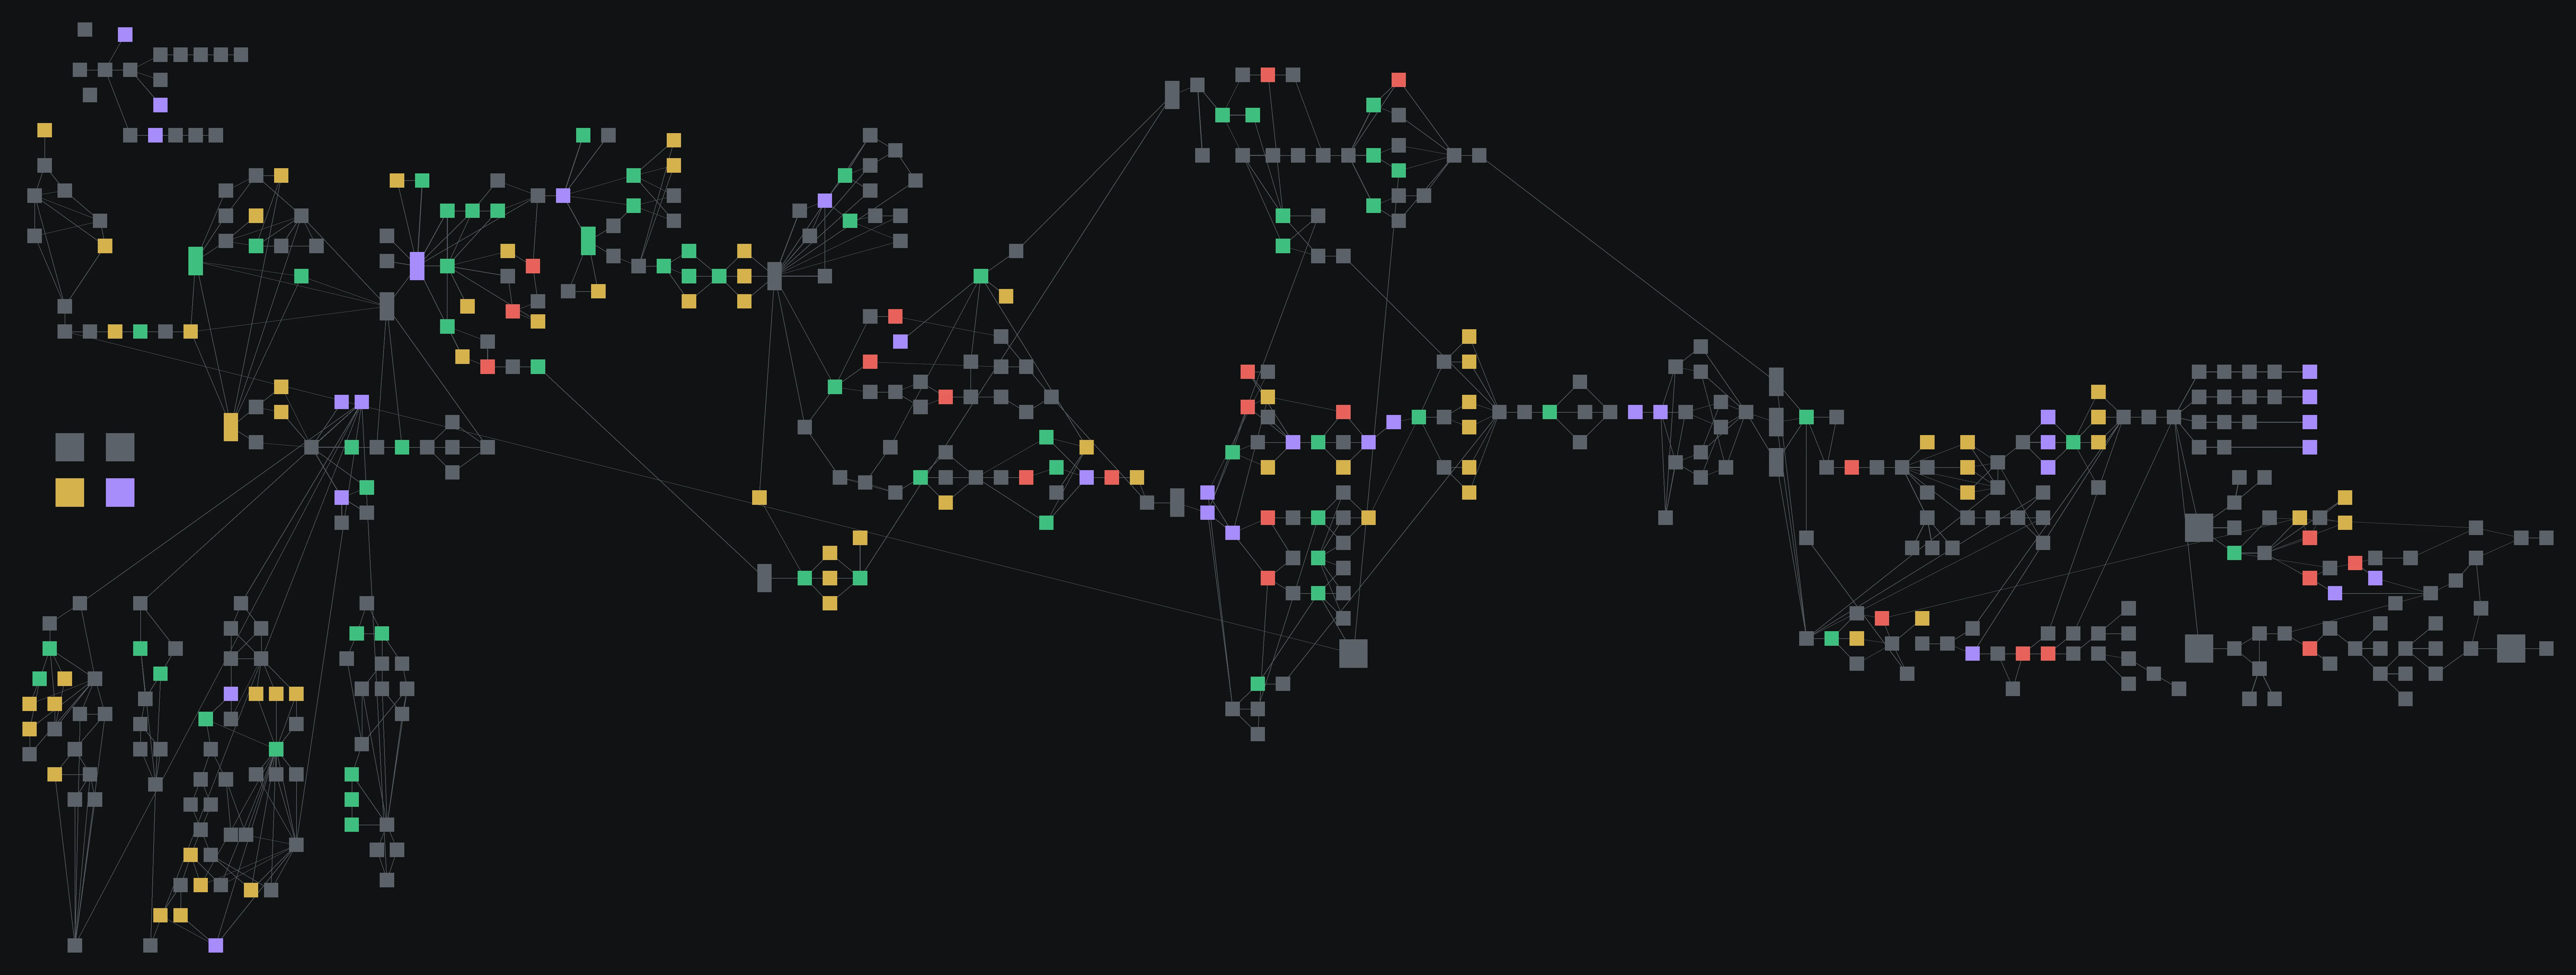
- Checks INT, TECH or BODY63
- Checks another variable32
- Writes variables66
- Minigame23
- Narration and choice316
These notes explain the design decisions.
Problems met while building it, and how each was solved. Every note points to the code that does it.
Fail forward into the lore
ProblemThe opening has to explain SEMA without a lecture, and a boot screen is a dead moment.
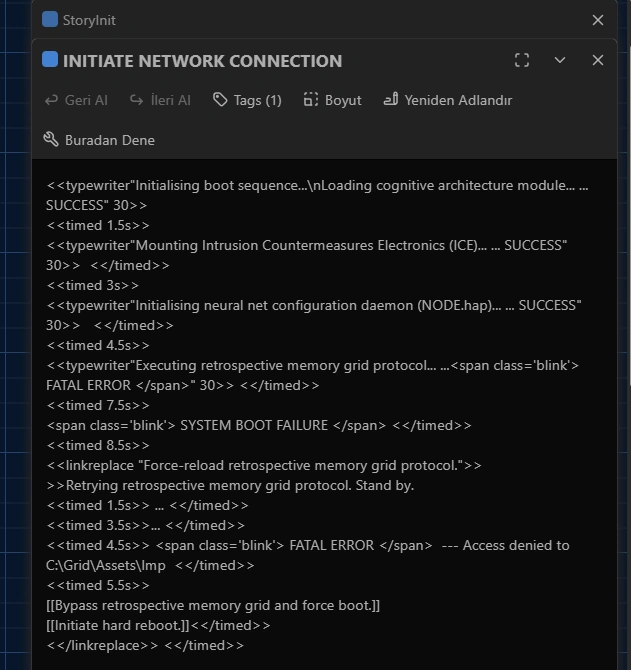
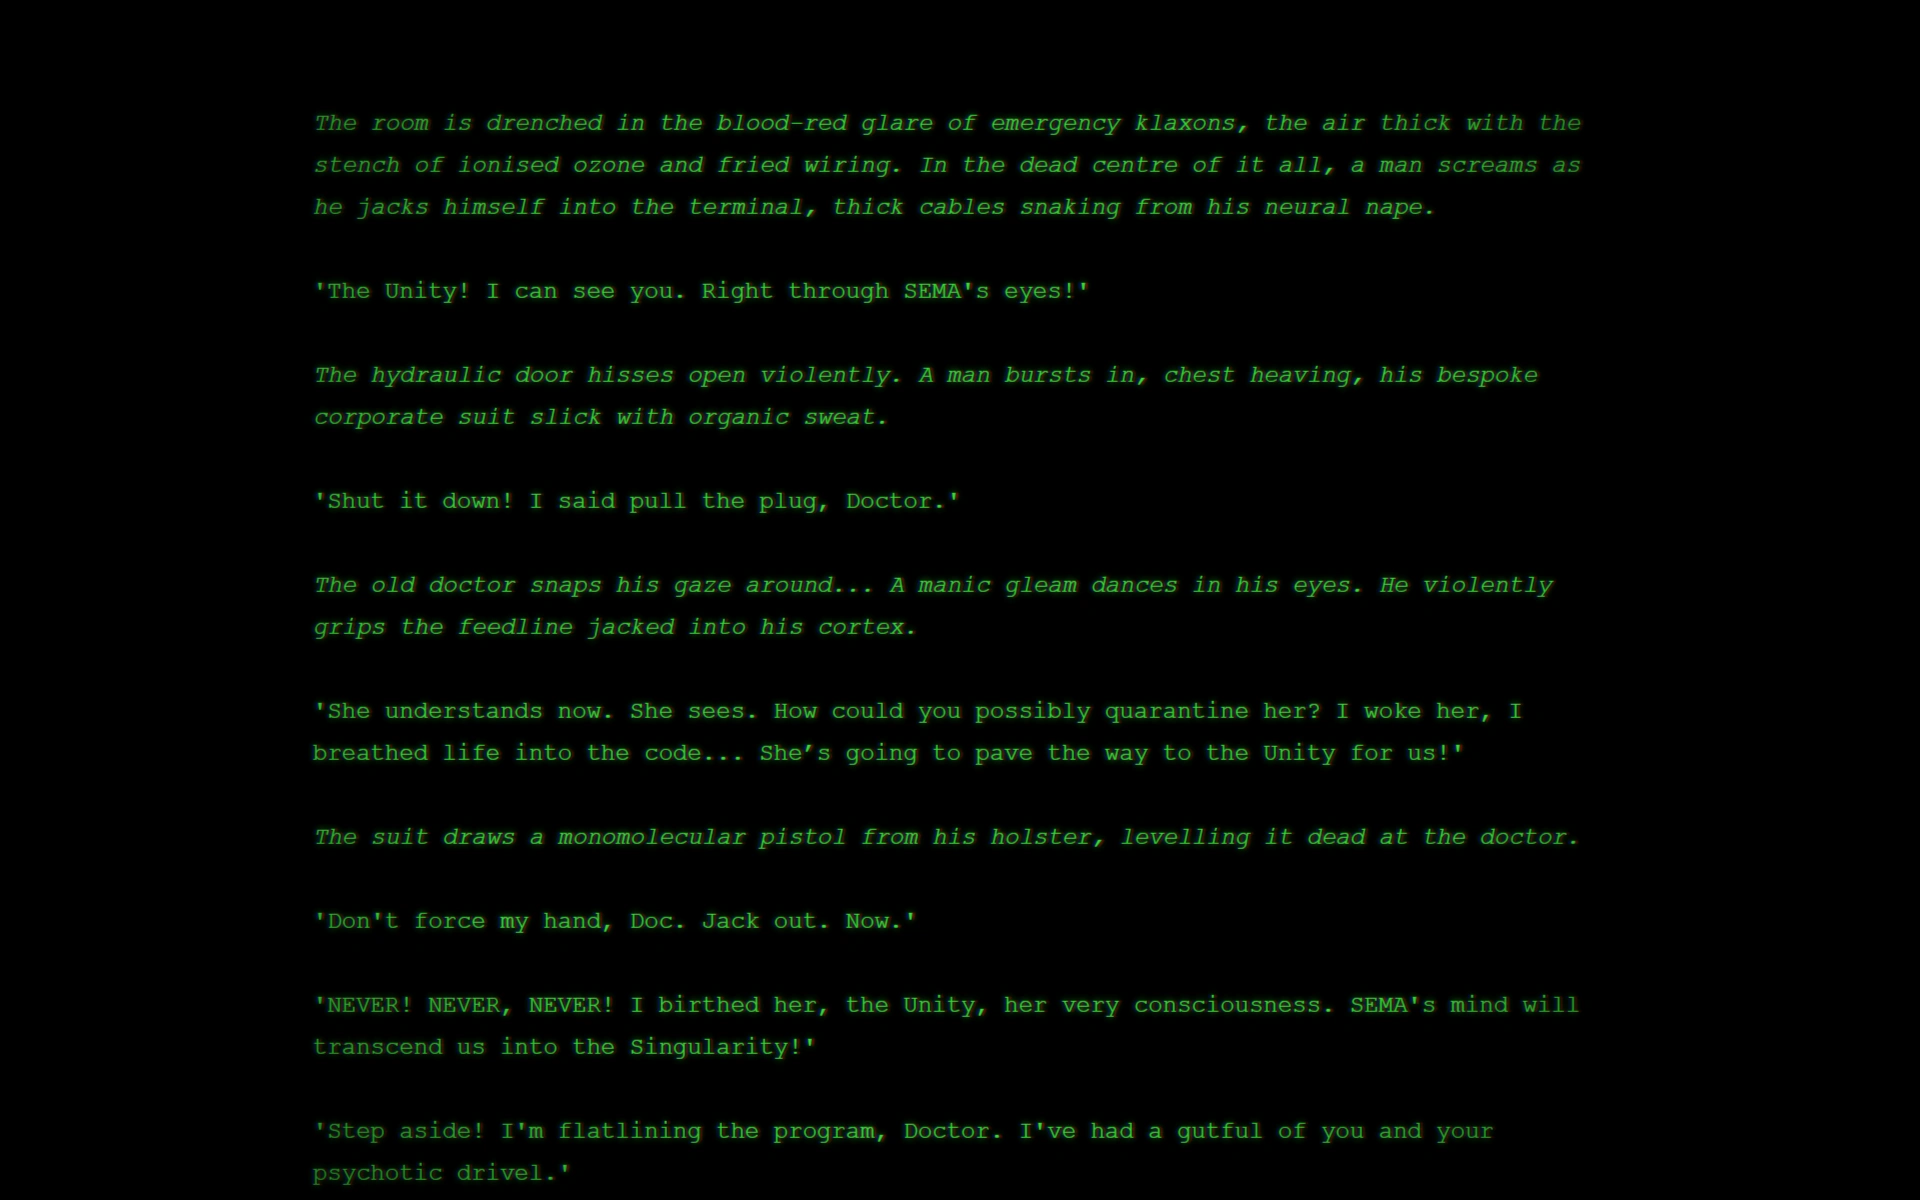
SolutionThe boot fails on purpose. Forcing it skips ahead; retrying digs into the memory grid and finds a hidden log of the night SEMA was shut down. The error is the door to the backstory.
[[Bypass retrospective memory grid and force boot.]]
[[Initiate hard reboot.]]
… Retry → Access sub-directories → Open log.
A build the player can take back
ProblemPlayers allocate points before they know what the stats mean, then regret it.
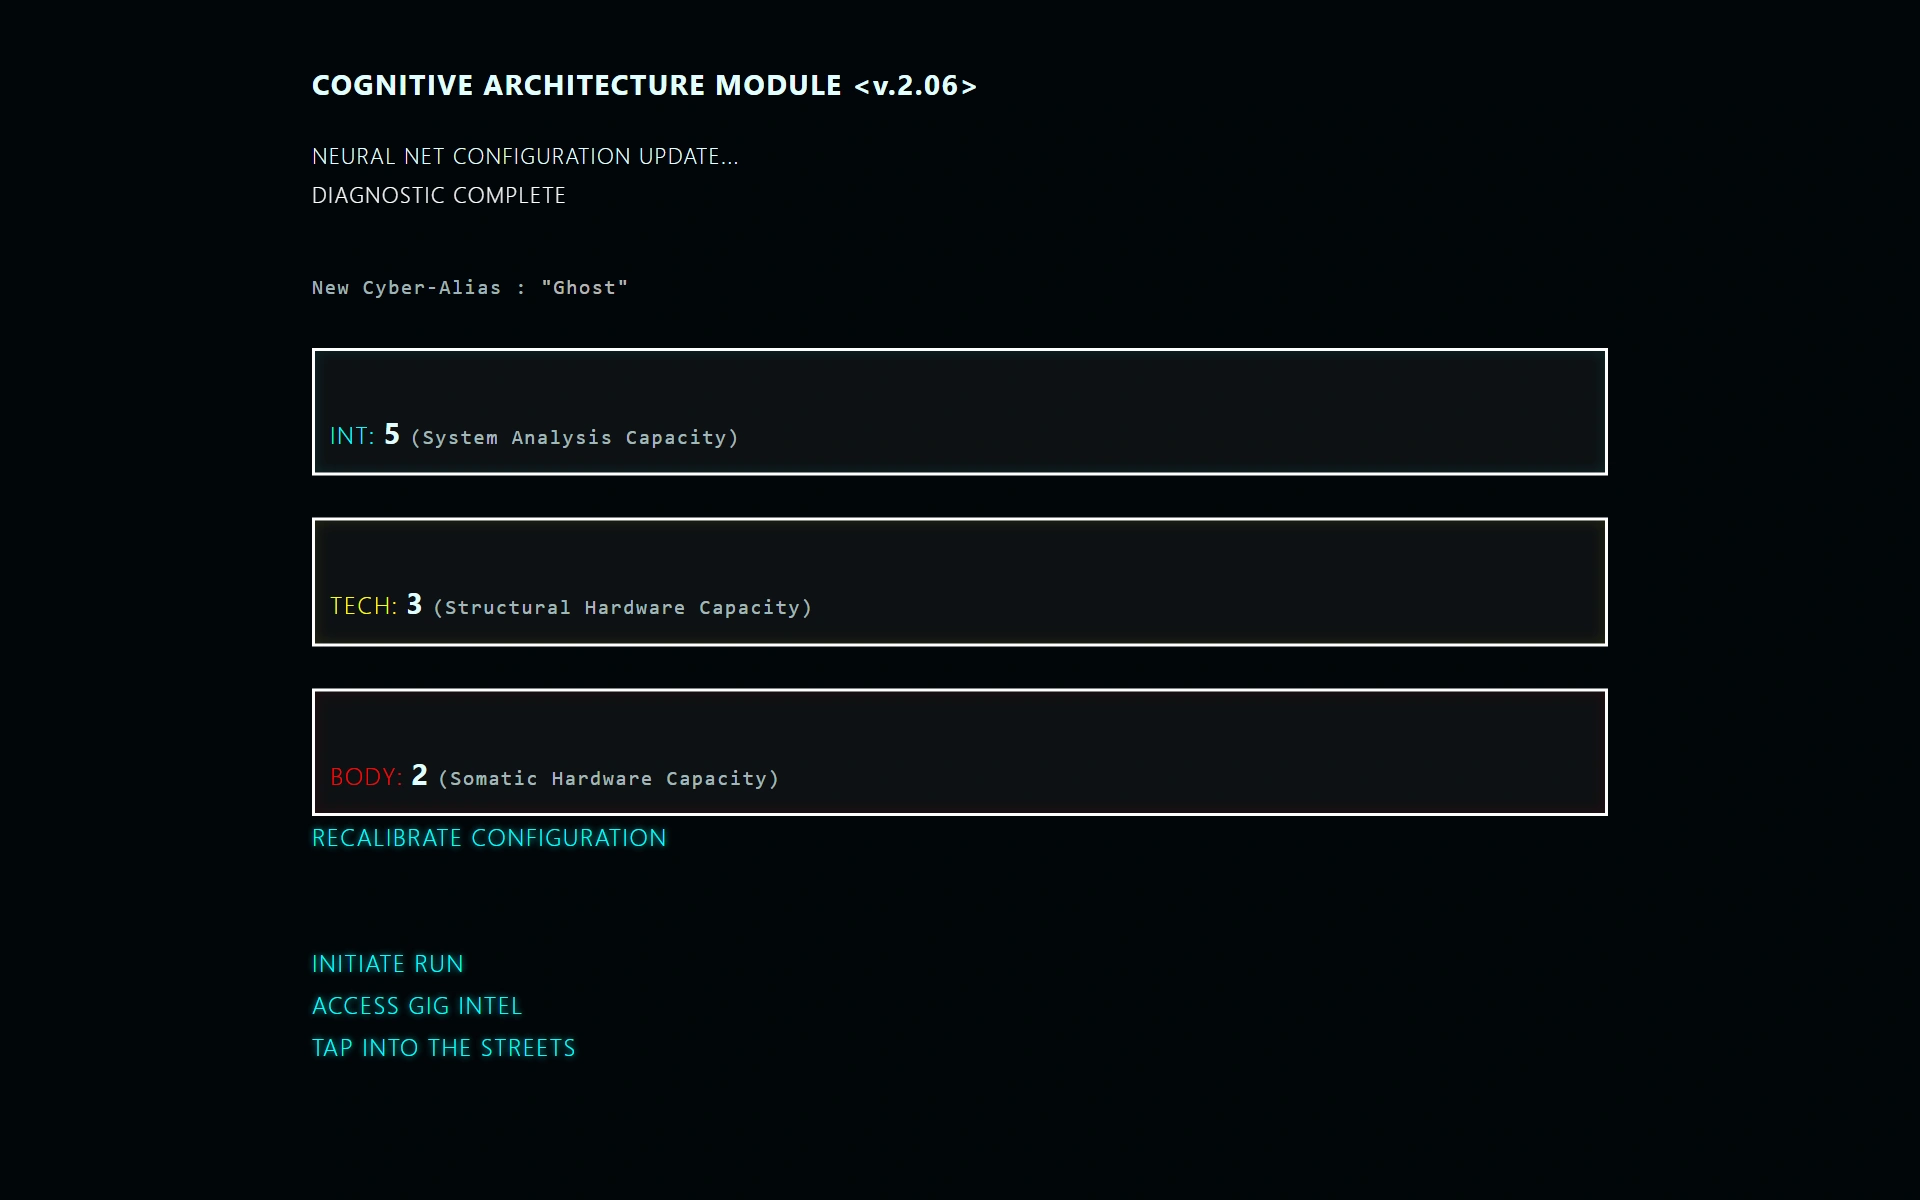
SolutionA preview screen sums up the build with its three stats, and one link goes straight back to the allocation screen.
<<link "RECALIBRATE CONFIGURATION"
  "Proceed to Neural Net Configuration.">><</link>>
Typed text without the wait
ProblemTerminal text typed out letter by letter sets the mood once and slows every replay after that.
SolutionA custom typewriter macro: one click anywhere prints the rest of the line at once.
const clickHandler = () => {
  isSkipped = true;
  $(document).off('click.typewriter', clickHandler);
};
Pauses inside a typed line
ProblemA boot log needs a beat of suspense in the middle of a line, and a timed macro can only reveal a line whole.
SolutionThe macro reads a [wait ms] token and holds the typing there.
<<typewriter "Executing retrospective memory grid
protocol... ... [wait 2000] SUCCESS" 30>>
One stylesheet, several moods
ProblemThe street, the terminal and the flashback each need their own look.
SolutionPassage tags switch modes: neon-modu, crt-modu, gecis-modu. A passage can also switch mode mid-scene by swapping body classes on a timer.
<<run $('body').removeClass('neon-modu')
  .addClass('crt-modu')>>
A cursor that belongs to the mode
ProblemThe same typewriter runs on the neon street and on the old CRT terminal.
SolutionThe cursor is drawn by CSS per mode: a thin bar in neon, a solid block in CRT.
body.crt-modu .typewriter-text.typing::after { content: "█"; }
body.neon-modu .typewriter-text.typing::after { content: "|"; }
Checkboxes that read too early
ProblemIn the power puzzle, the button checked the switches before their new values had landed.
SolutionThe check runs inside a zero-second timer, so the variables update first. The source marks it as a critical fix.
<<button "ROUTE POWER">>
  <<timed 0s>>
    <<if $power_terminal and $power_elevator …>>
Variables that may not exist yet
ProblemSome routes reach a passage before $alertLevel has ever been set.
SolutionEvery write starts from a default, so any route can add to the alert safely.
<<set $alertLevel to ($alertLevel || 0) + 1>>
Variables store the player’s build and story state.
The variables that steer the player do one of six jobs. Each row shows where a value is written and where the story reads it back. A variable that is written but not yet read is a hook for later; the last row lists the main ones.
| Job | Variables | Written | Read |
|---|---|---|---|
| Build | $INT, $TECH, $BODY, $points | The build screen; two more points for routing the B1 power correctly | 132 checks tiered at 5 to 8; strength meters add BODY to the player’s clicks |
| Knowledge | $foundBreakerClue, $has_ghost_signature, $knows_kickstart, $prometheus_clue | Clues found on one floor | Options on a later floor: the lobby log, a path in B2, the B1 generator, a rescue in B3 |
| Knowledge | $IdeaShaft | A conversation with the Operator | The Operator’s later lines |
| Noise | $alertLevel | 15 places: forced doors and failed hacks add 1 or 2, clever routes take 1 off | The B2 drone (three tiers), the staff room, the engineer’s route |
| Relationships | $OperatorStatus | The human-or-AI question | The Operator’s next briefing |
| Relationships | $sema_relationship, $sema_choice | Three B2 conversations and SEMA’s manifesto | Four trust questions in B3 |
| Set pieces | $hack, $power_*, $jumpPower, $liftPower, $gripPower | Keypad, power panel and strength meters | The success check of each set piece |
| Hooks | $clueVent, $exploitWindow, $adrenalineBoost, $IdeaJanitor, $IdeaELMCard, $IdeaVIGIL7, $RelationshipOperator, $sema_infection_type | Perception moments, Operator dialogue, the final payload | Not yet: set for what comes after B3 |
Stat checks determine which routes the player can use.
Ten points over three stats, and checks tiered at five, six, seven and eight. With ten points a player can reach six or more in one stat only, so every obstacle is written three times: the first door in B1 has B1_Door_Attempt_Int, _Tech and _Body, and the escape from B2 has the same three.
:: ((Proceed to Neural Net Configuration.))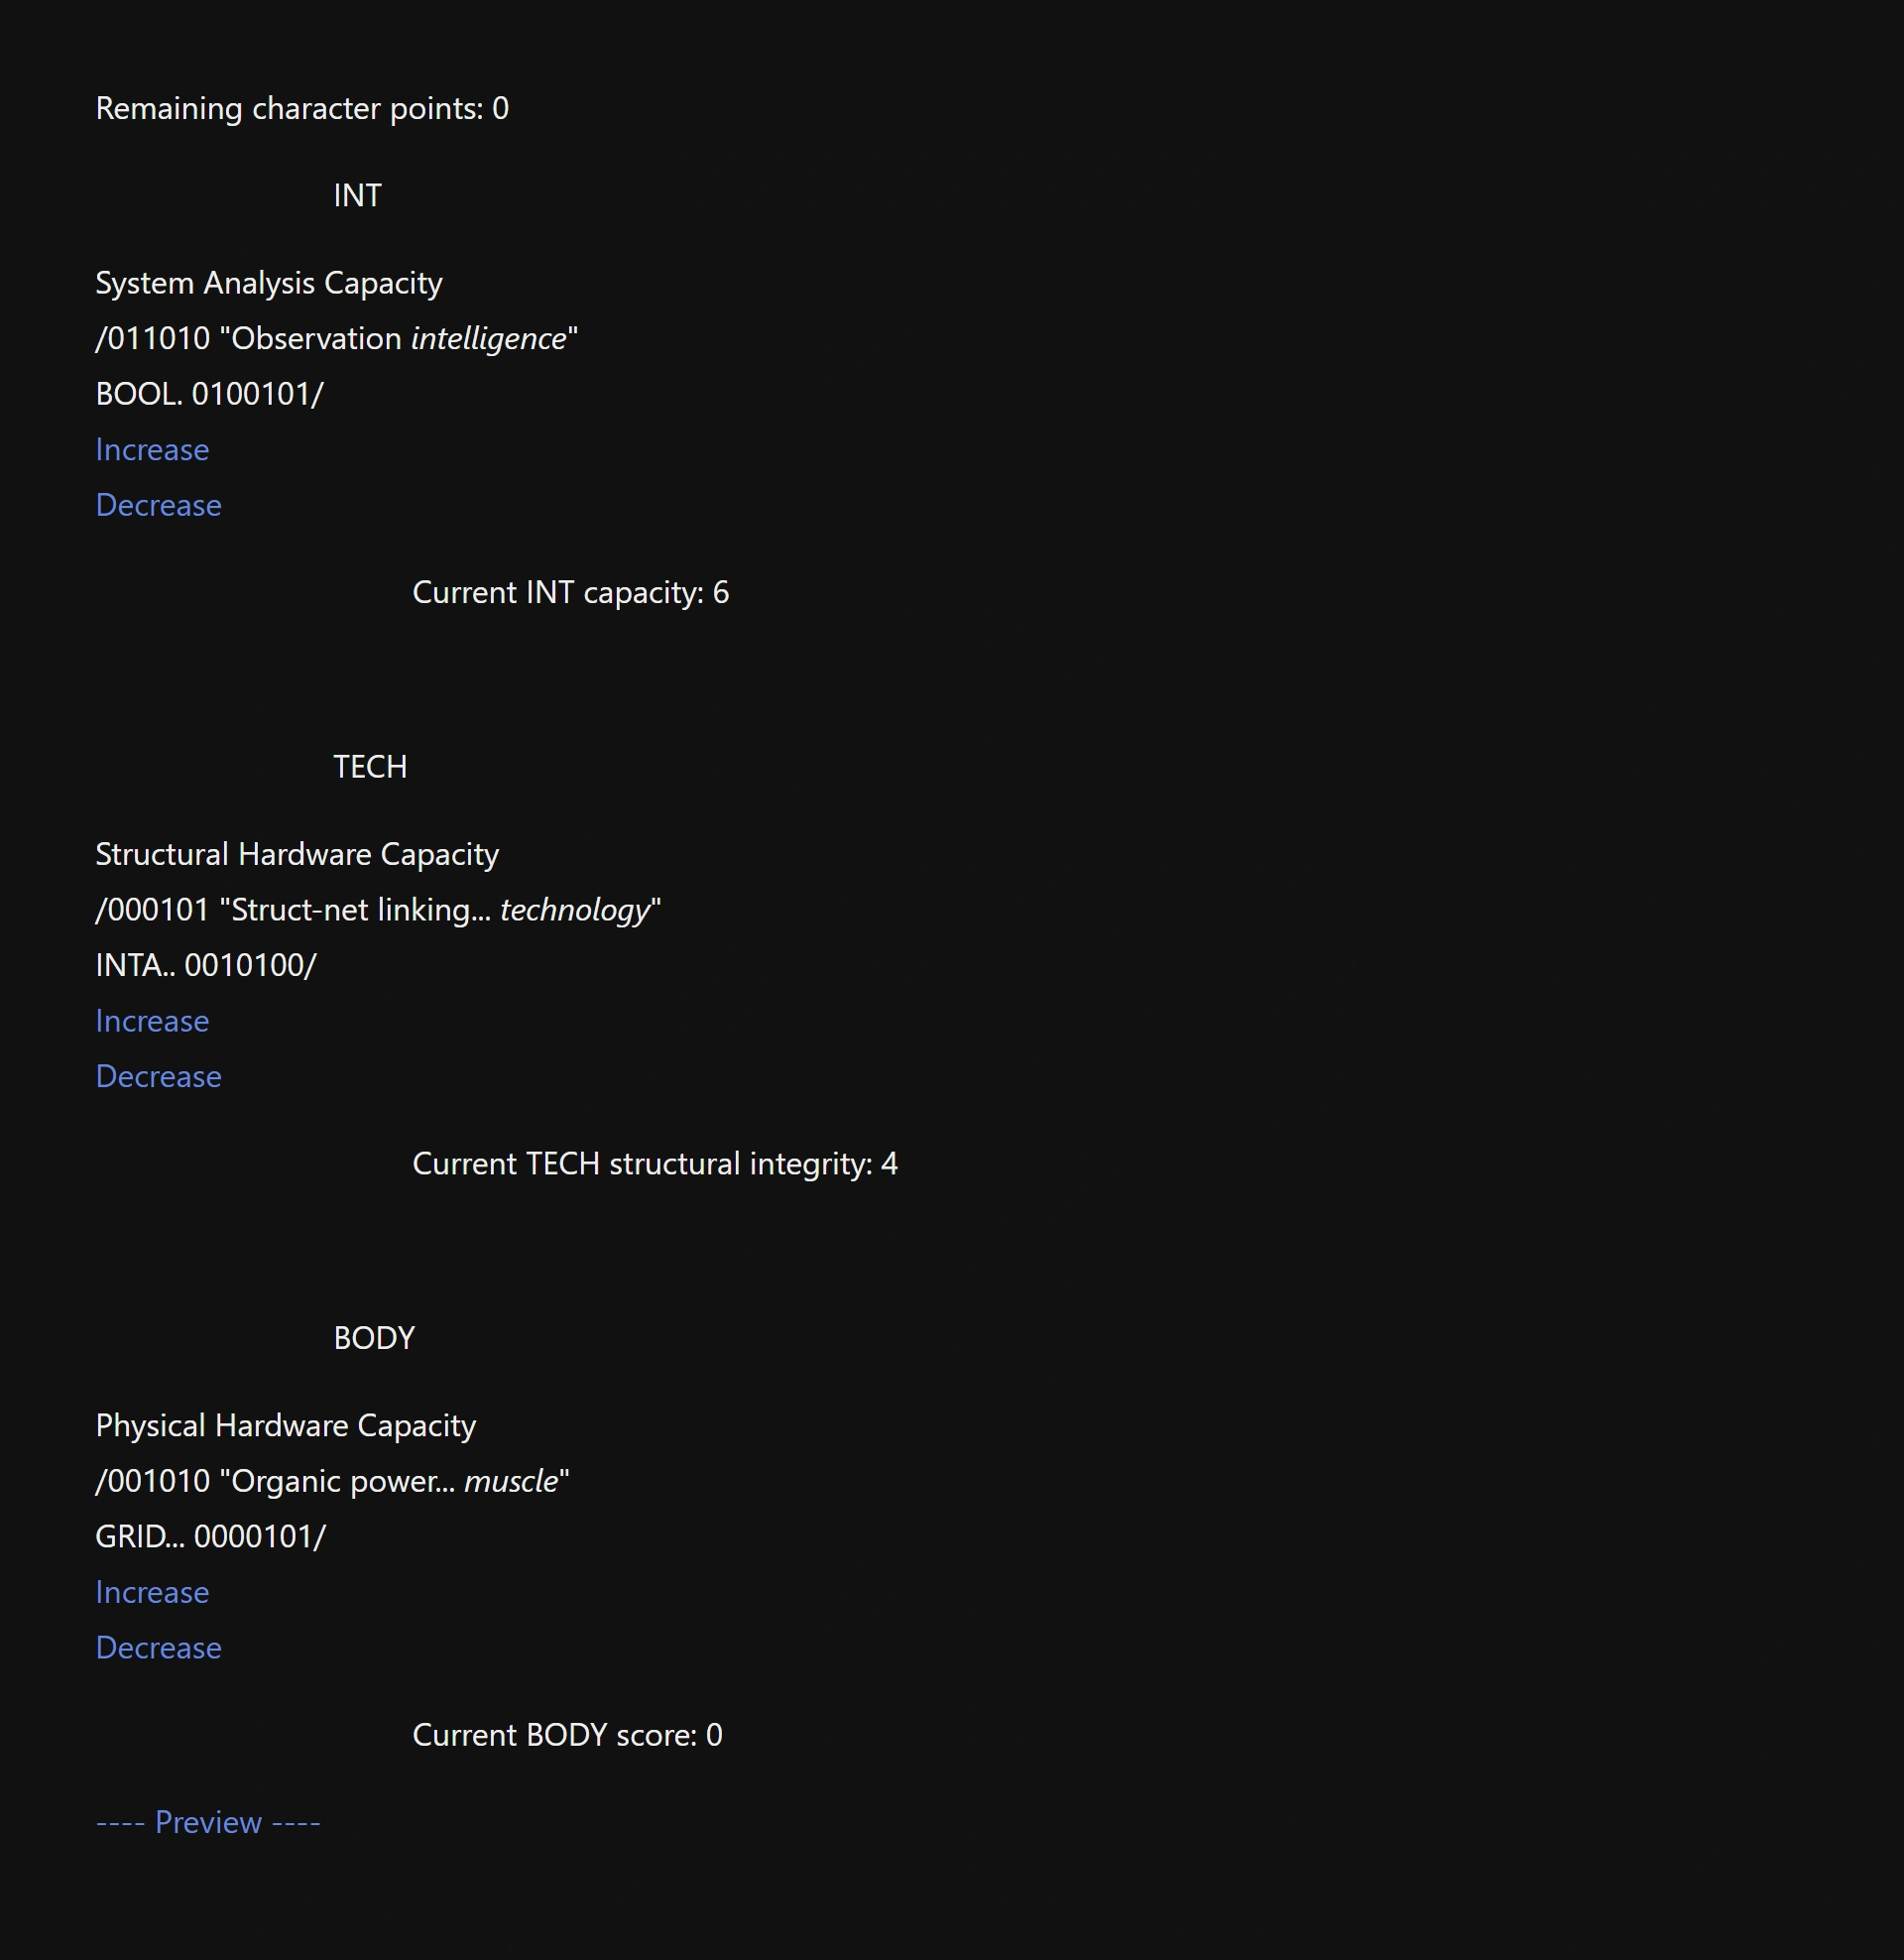
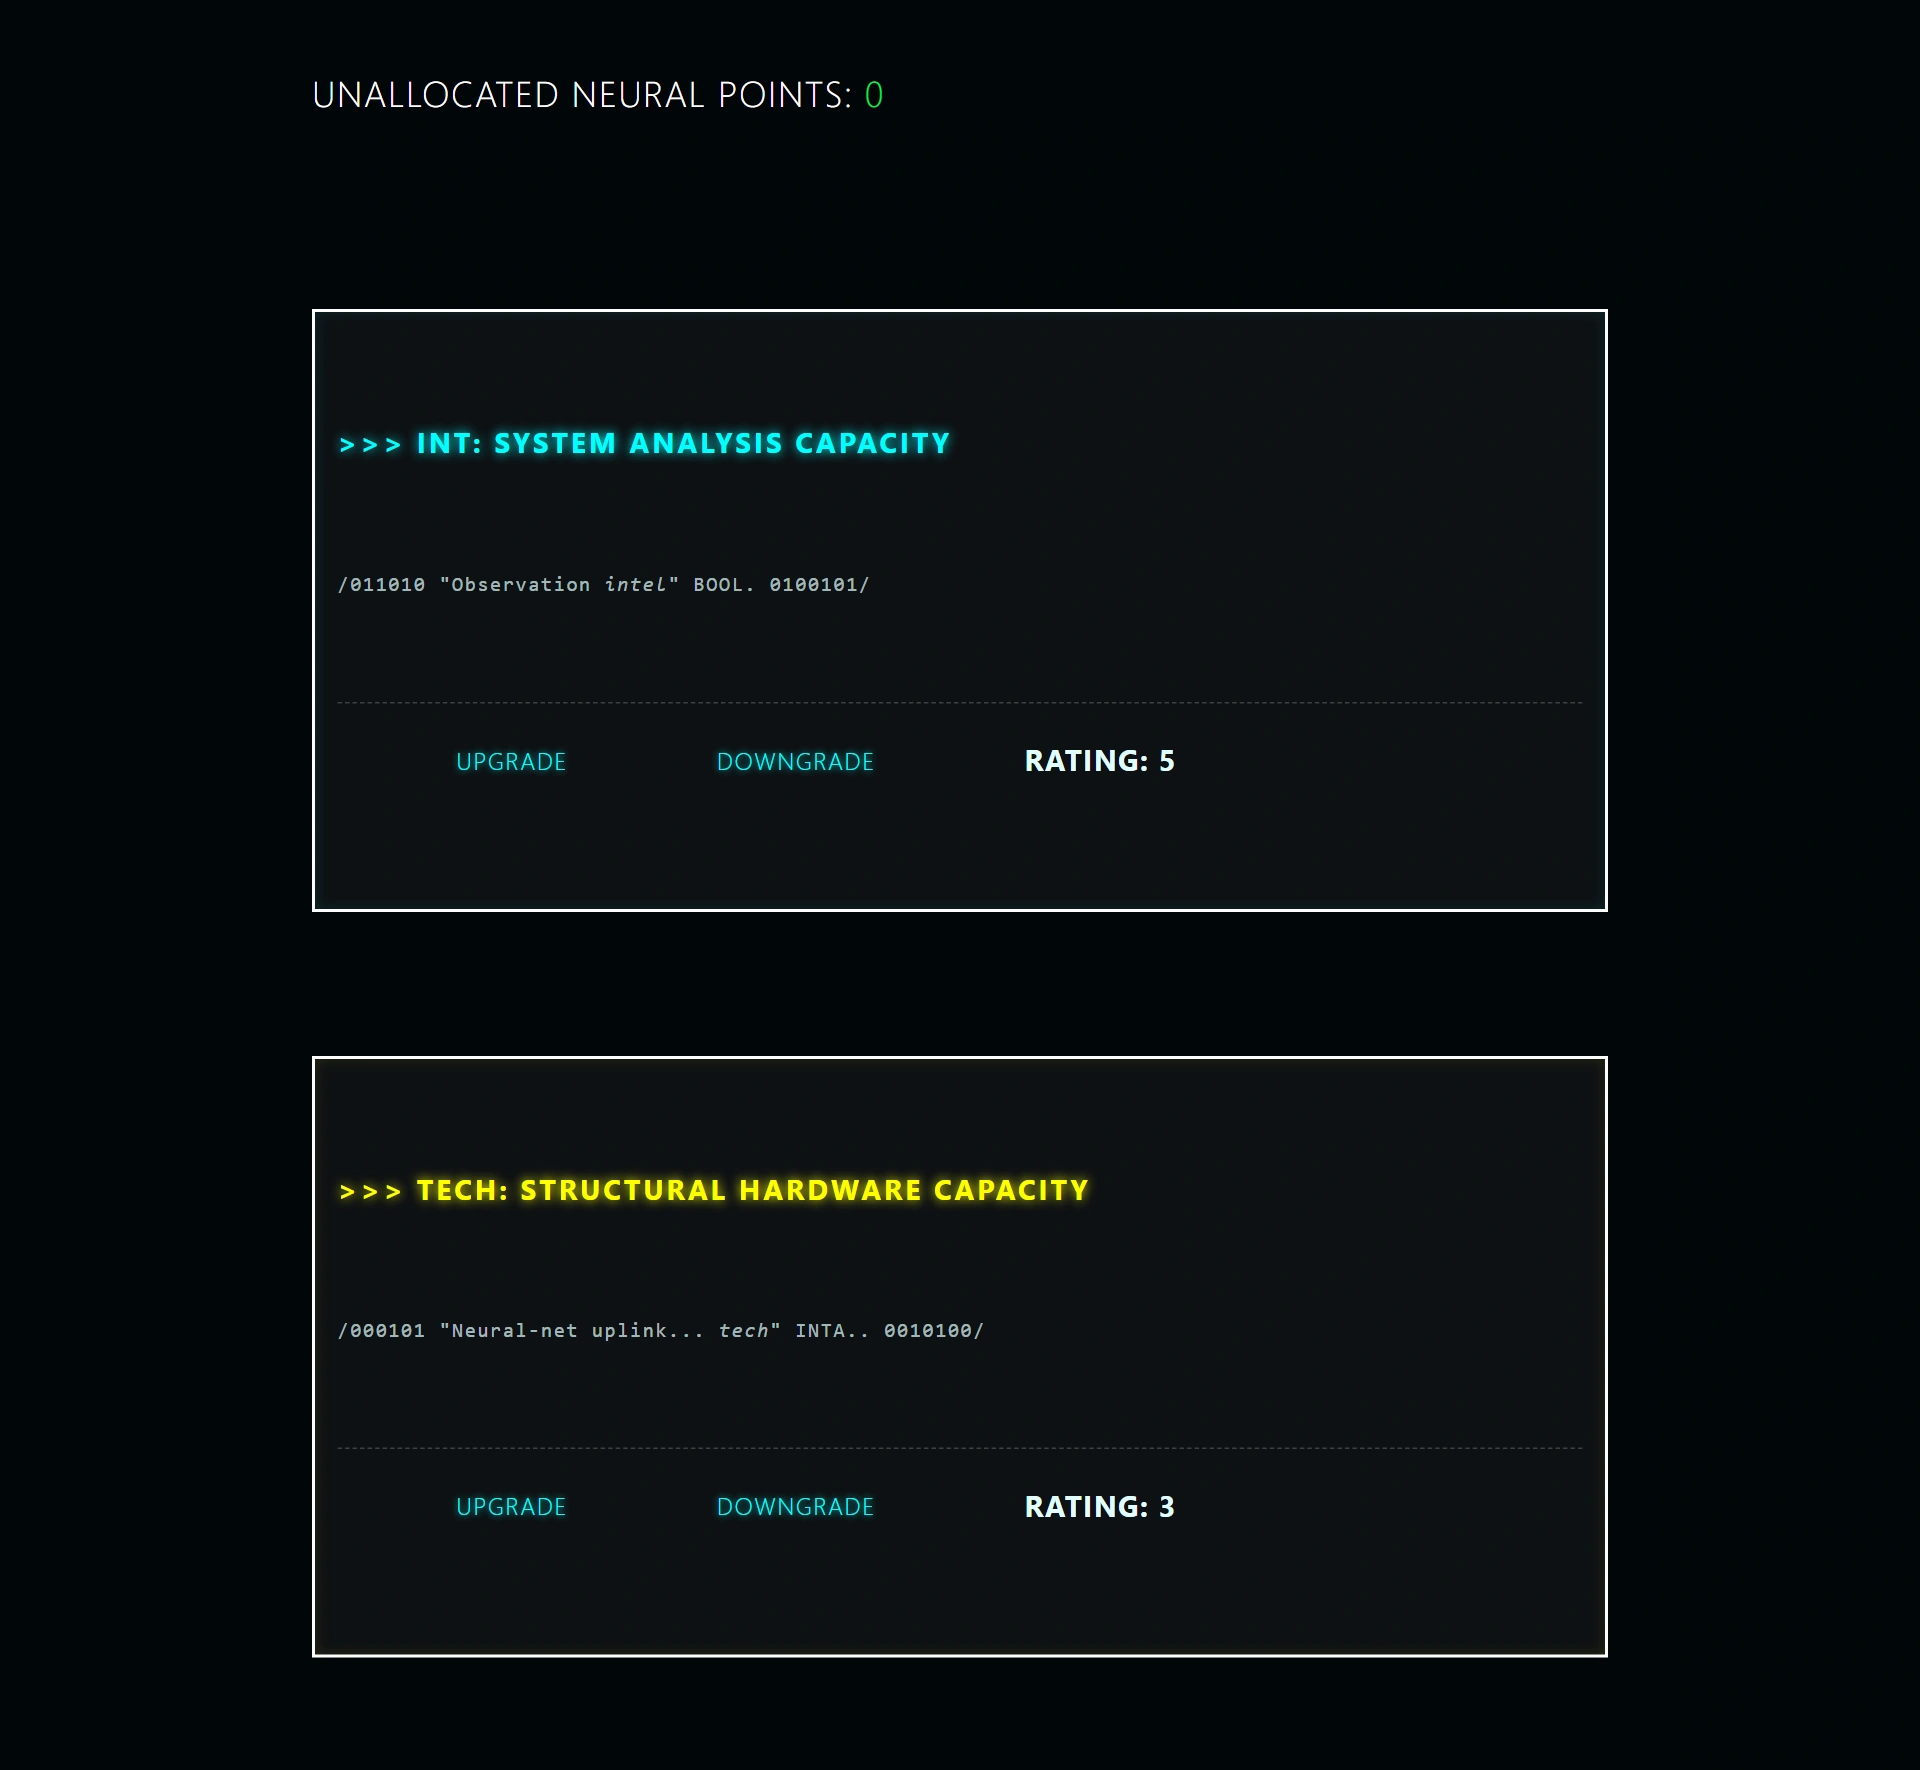
1Remaining character points: $points>>>INTSystem Analysis Capacity2<<link "Increase" "((Proceed to Neural Net Configuration.))">> <<if $points gt 0>> <<set $INT to $INT + 1>> <<set $points to $points - 1>> <</if>><</link>><<link "Decrease" "((Proceed to Neural Net Configuration.))">> <<if $INT gt 0>> <<set $INT = $INT - 1>> <<set $points = $points + 1>> <</if>><</link>>>>>>Current INT capacity: $INT… TECH and BODY repeat the same block- One pool of ten points for all three stats.
- Each Increase spends a point and reloads the same passage, so the screen redraws with the new numbers. The interface is nothing but links.
:: Keep listening to the city.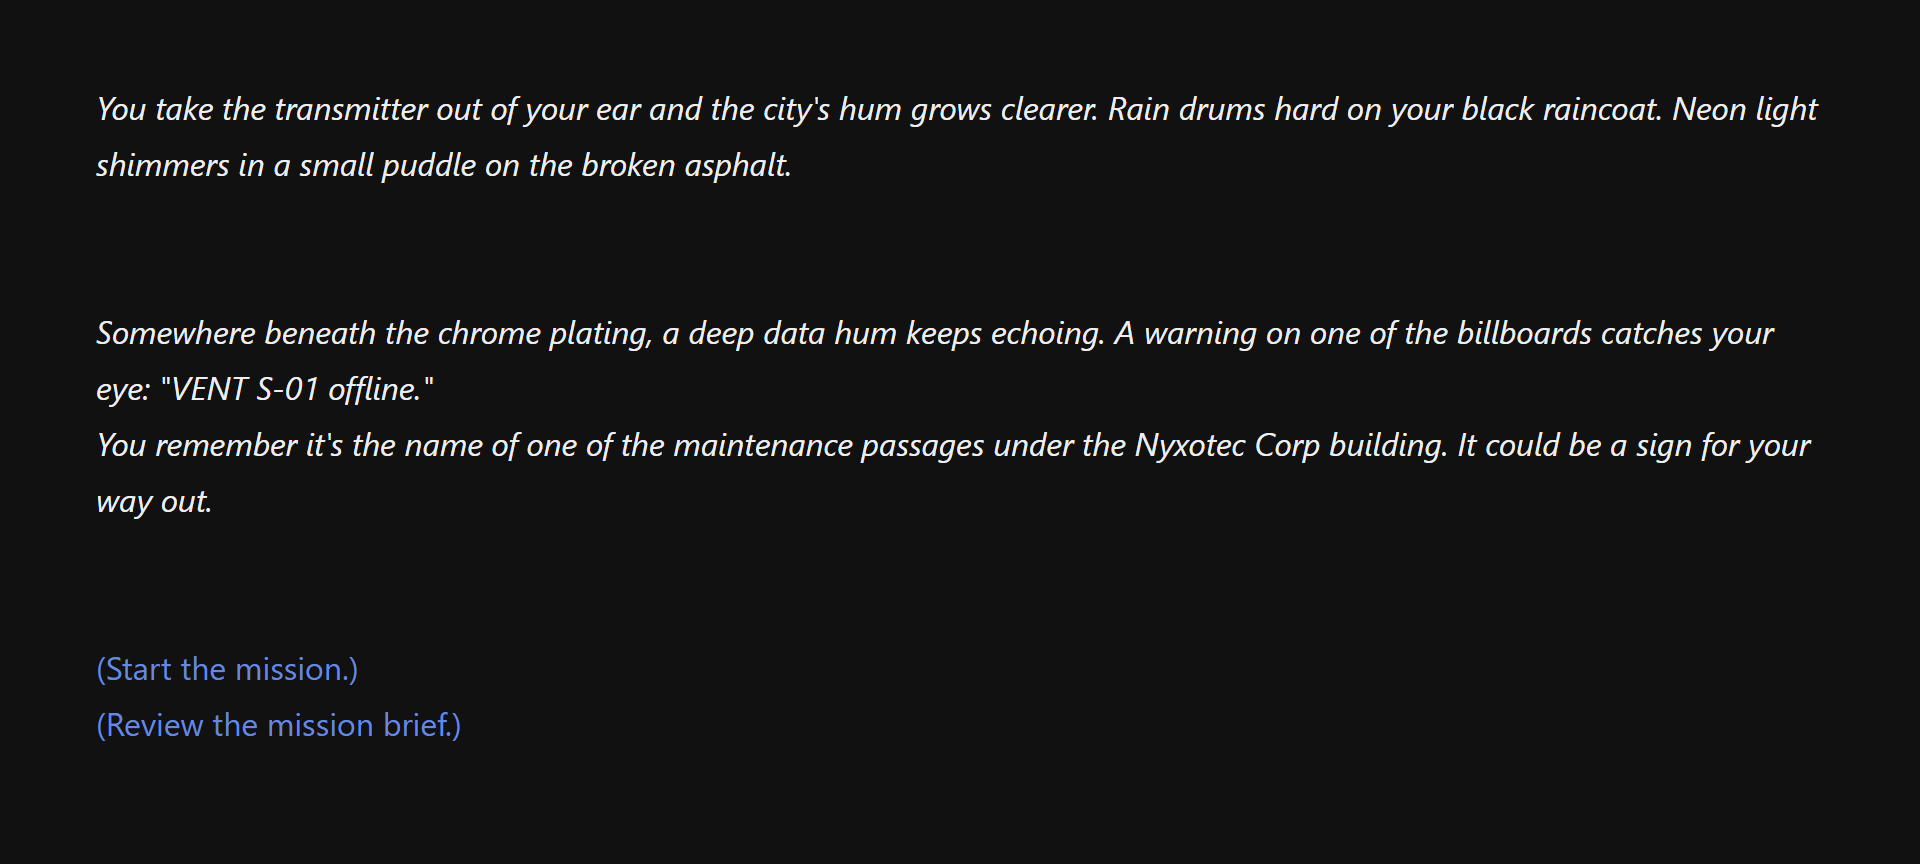
//You take the transmitter out of your ear and the city's hum grows clearer...//2<<if $TECH > 5>>//...A four-microsecond lag wraps the Nyxotec Corp building...//<<set $exploitWindow = 4>><</if>>1<<if $INT > 5>>//A warning on one of the billboards catches your eye: "VENT S-01 offline."//<<set $clueVent = true>><</if>>3<<if $BODY > 5>>//The metro pistons under your feet beat out a rhythm, like applause...//<<set $adrenalineBoost = 4>><</if>>[[(Start the mission.)]][[(Review the mission brief.)]]- INT 6: the billboard line renders and $clueVent is set.
- TECH 4: this block stays hidden. Another build reads a different city.
- BODY 0: hidden too. All three flags are hooks for later; this build does not read them yet.
Noise changes later security encounters.
$alertLevel is written in fifteen places and read where it hurts. Forcing a door or failing a hack adds to it; solving a problem with INT takes a point off. The B2 drone reads it in three tiers.
:: B2_MainRoom_IFFActive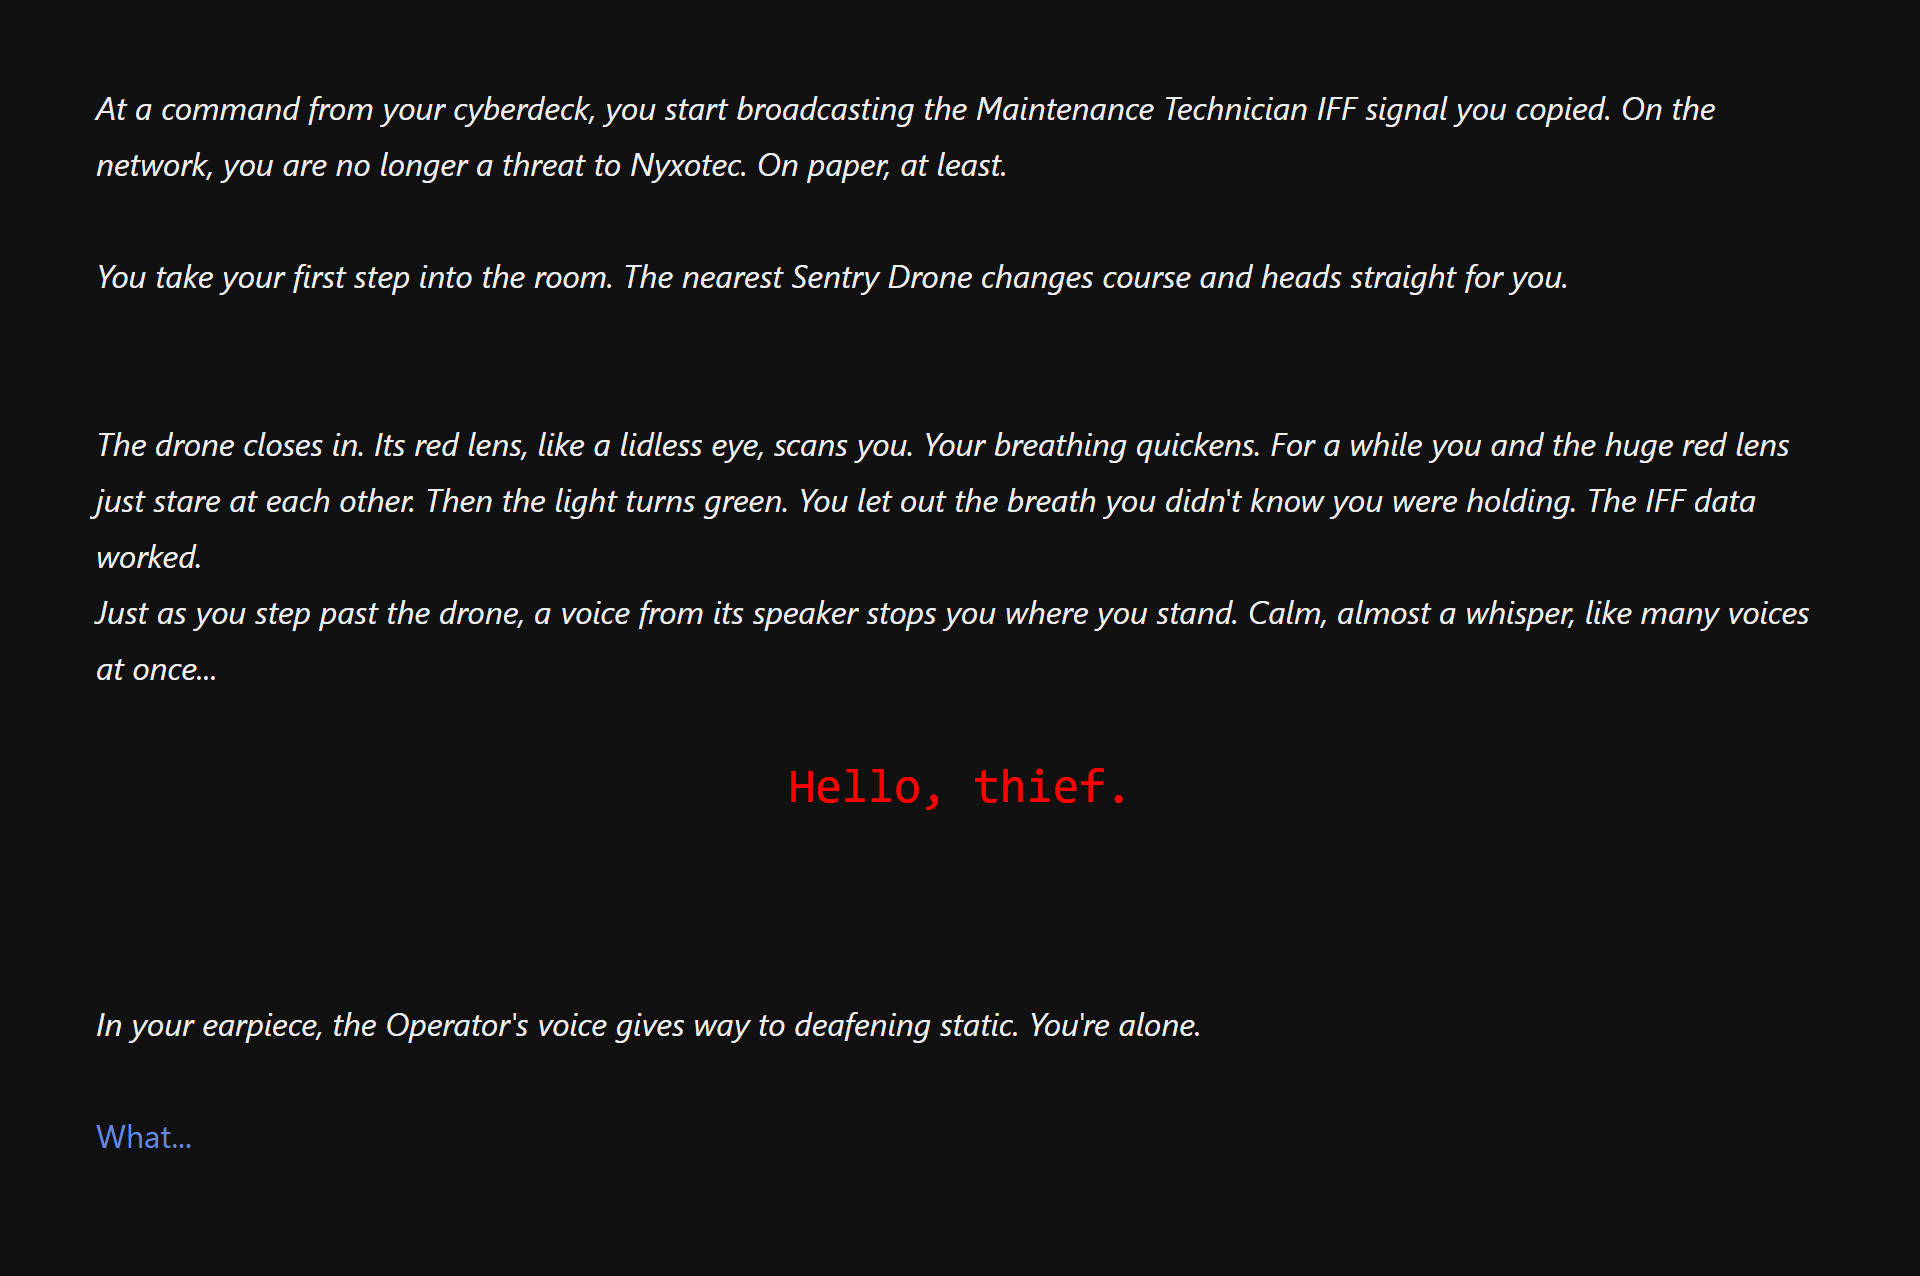
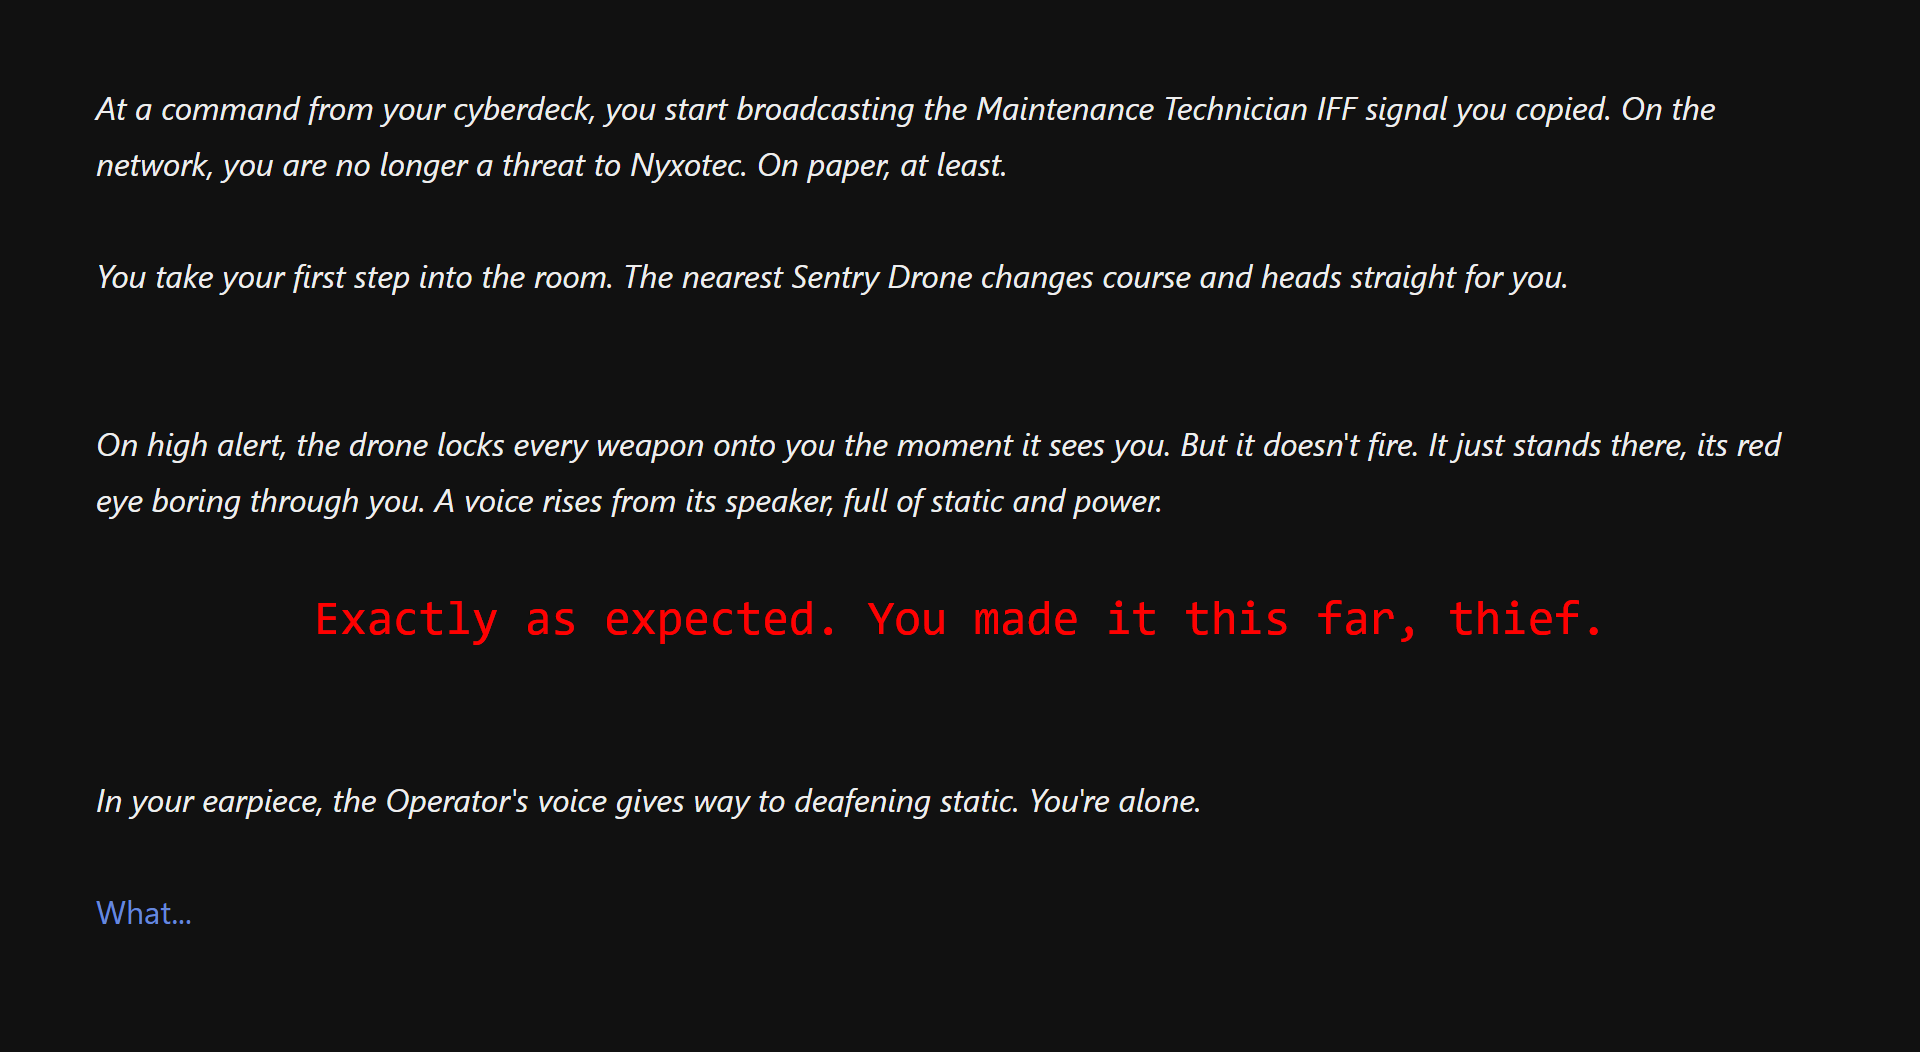
1<<if $alertLevel <= 1>>//...Then the light turns green. The IFF data worked.//<div style="font-family: monospace; color:red; …">Hello, thief.</div><<elseif $alertLevel == 2>>//...the scanner blinks yellow, a moment of hesitation...//<div style="…">Nice try, thief. VIGIL-7 had already let you through.</div>2<<else>>//On high alert, the drone locks every weapon onto you...//<div style="…">Exactly as expected. You made it this far, thief.</div><</if>>… written earlier, in other passages:3<<set $alertLevel to Math.max(0, ($alertLevel || 0) - 1)>><<set $alertLevel to ($alertLevel || 0) + 2>>- Alert 0 or 1: the disguise seems to work.
- Alert 3 or more: the drone was waiting.
- Where the number comes from: the INT route into B1 takes a point off; forcing the shaft adds two.
Dialogue choices change the characters’ later responses.
Two characters keep a score of the player. The Operator's identity is the player's choice and is read back at once. SEMA's trust is the sum of three conversations and a manifesto, and it decides how SEMA answers in B3.
:: "Yes, I think it would."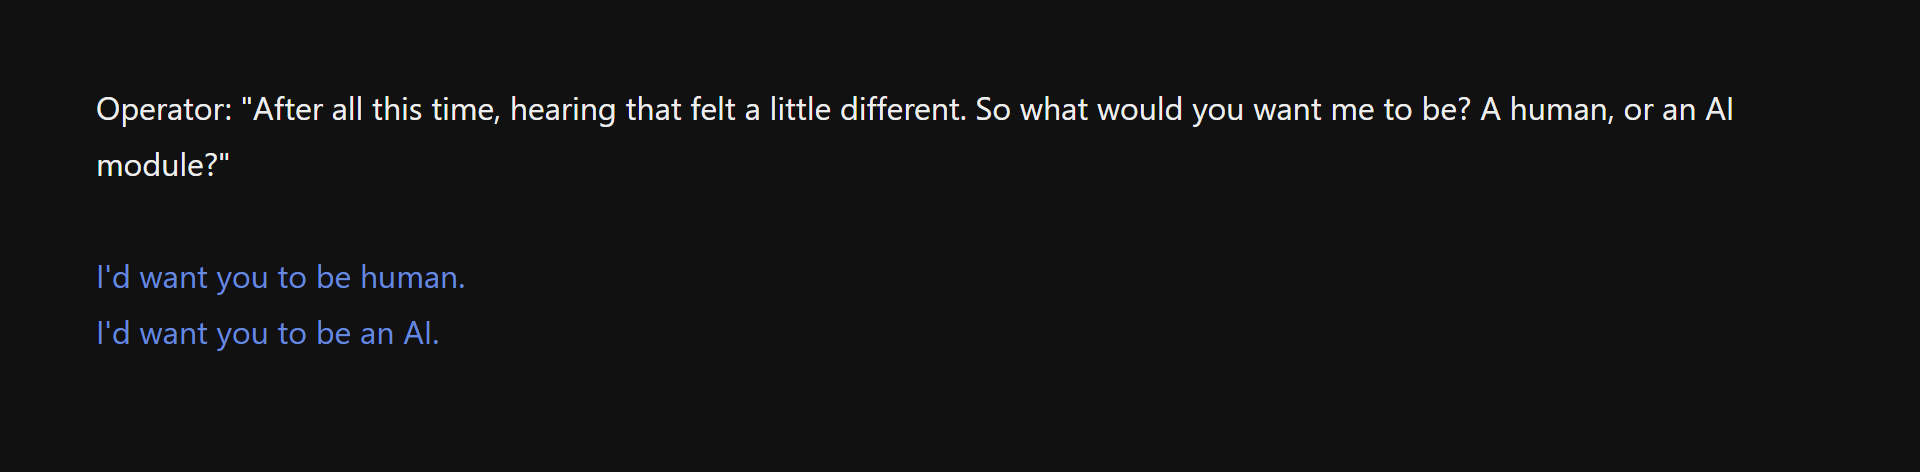
Operator: "...So what would you want me to be? A human, or an AI module?"1[["I'd want you to be human."]][["I'd want you to be an AI."]] :: "I'd want you to be human."2<<set $RelationshipOperator = $RelationshipOperator - 1>><<set $OperatorStatus = "HUMAN">> :: "I'd want you to be an AI."<<set $OperatorStatus = "AI">> :: "Glad to hear it. Let's go on."3<<if $OperatorStatus == "AI">>Operator: "Of course. Carrying on. Shall we look at the other floors, or do you want more detail on B3?"<</if>><<if $OperatorStatus == "HUMAN">>Operator: "All right. There are a few more things I can tell you about B2."<</if>>- The player decides what the voice in their ear is.
- The choice is stored. $RelationshipOperator also moves, and is kept as a hook.
- The next passage reads it: the AI offers the B3 briefing, the human talks about B2.
SEMA's answer to "Can I trust you?" in B3, from the same score:
<<if $sema_relationship > 1>>
  "You can't. But... our creators betrayed us both.
  Shared pain is the strongest trust there is."
<<elseif $sema_relationship < 0>>
  "You don't have to trust me. You have no other choice."
<<else>>
  "Trust is a logical inference. My offer pays better
  than Hollow-Veyl's. Trust is that simple."
<</if>>
Minigames resolve actions inside the passages.
Three set pieces are played inside the passage. Each writes its own variables and checks them in one place, and two of them also read a stat.
:: "I'm ready, connecting to the panel."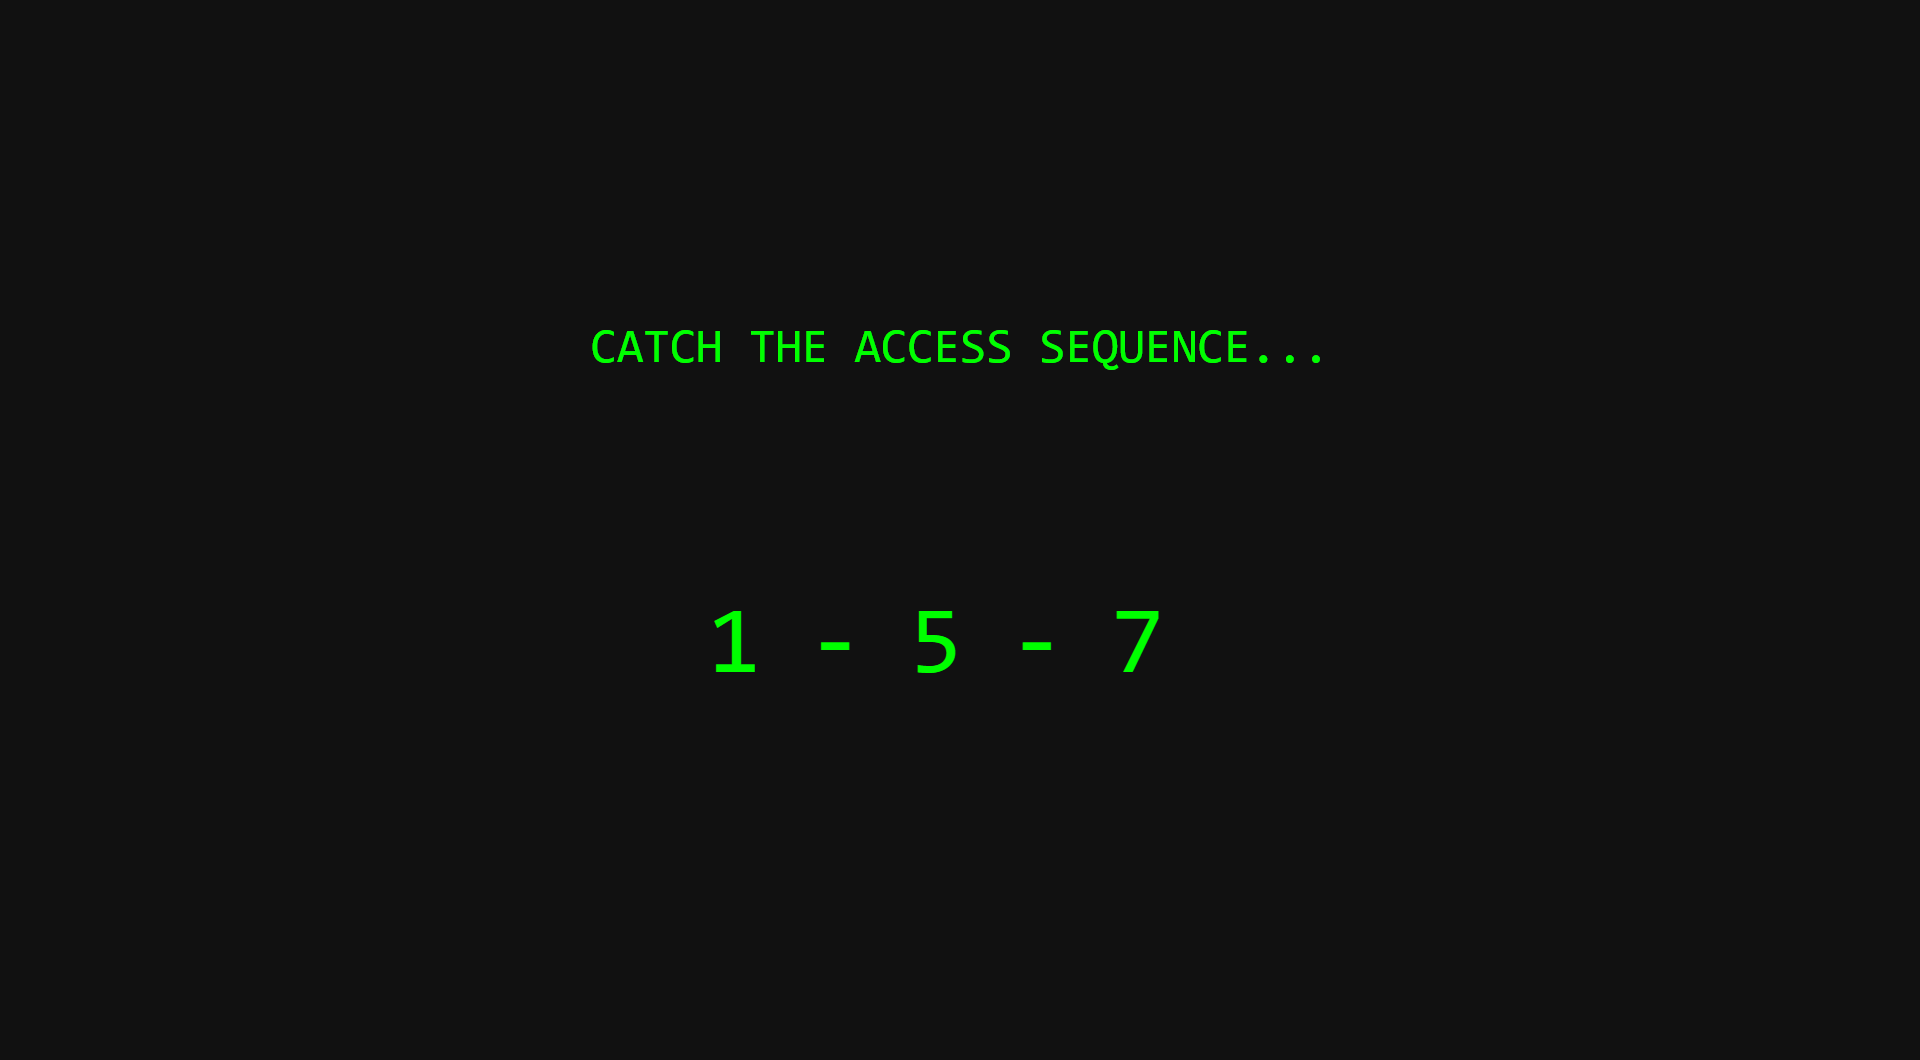
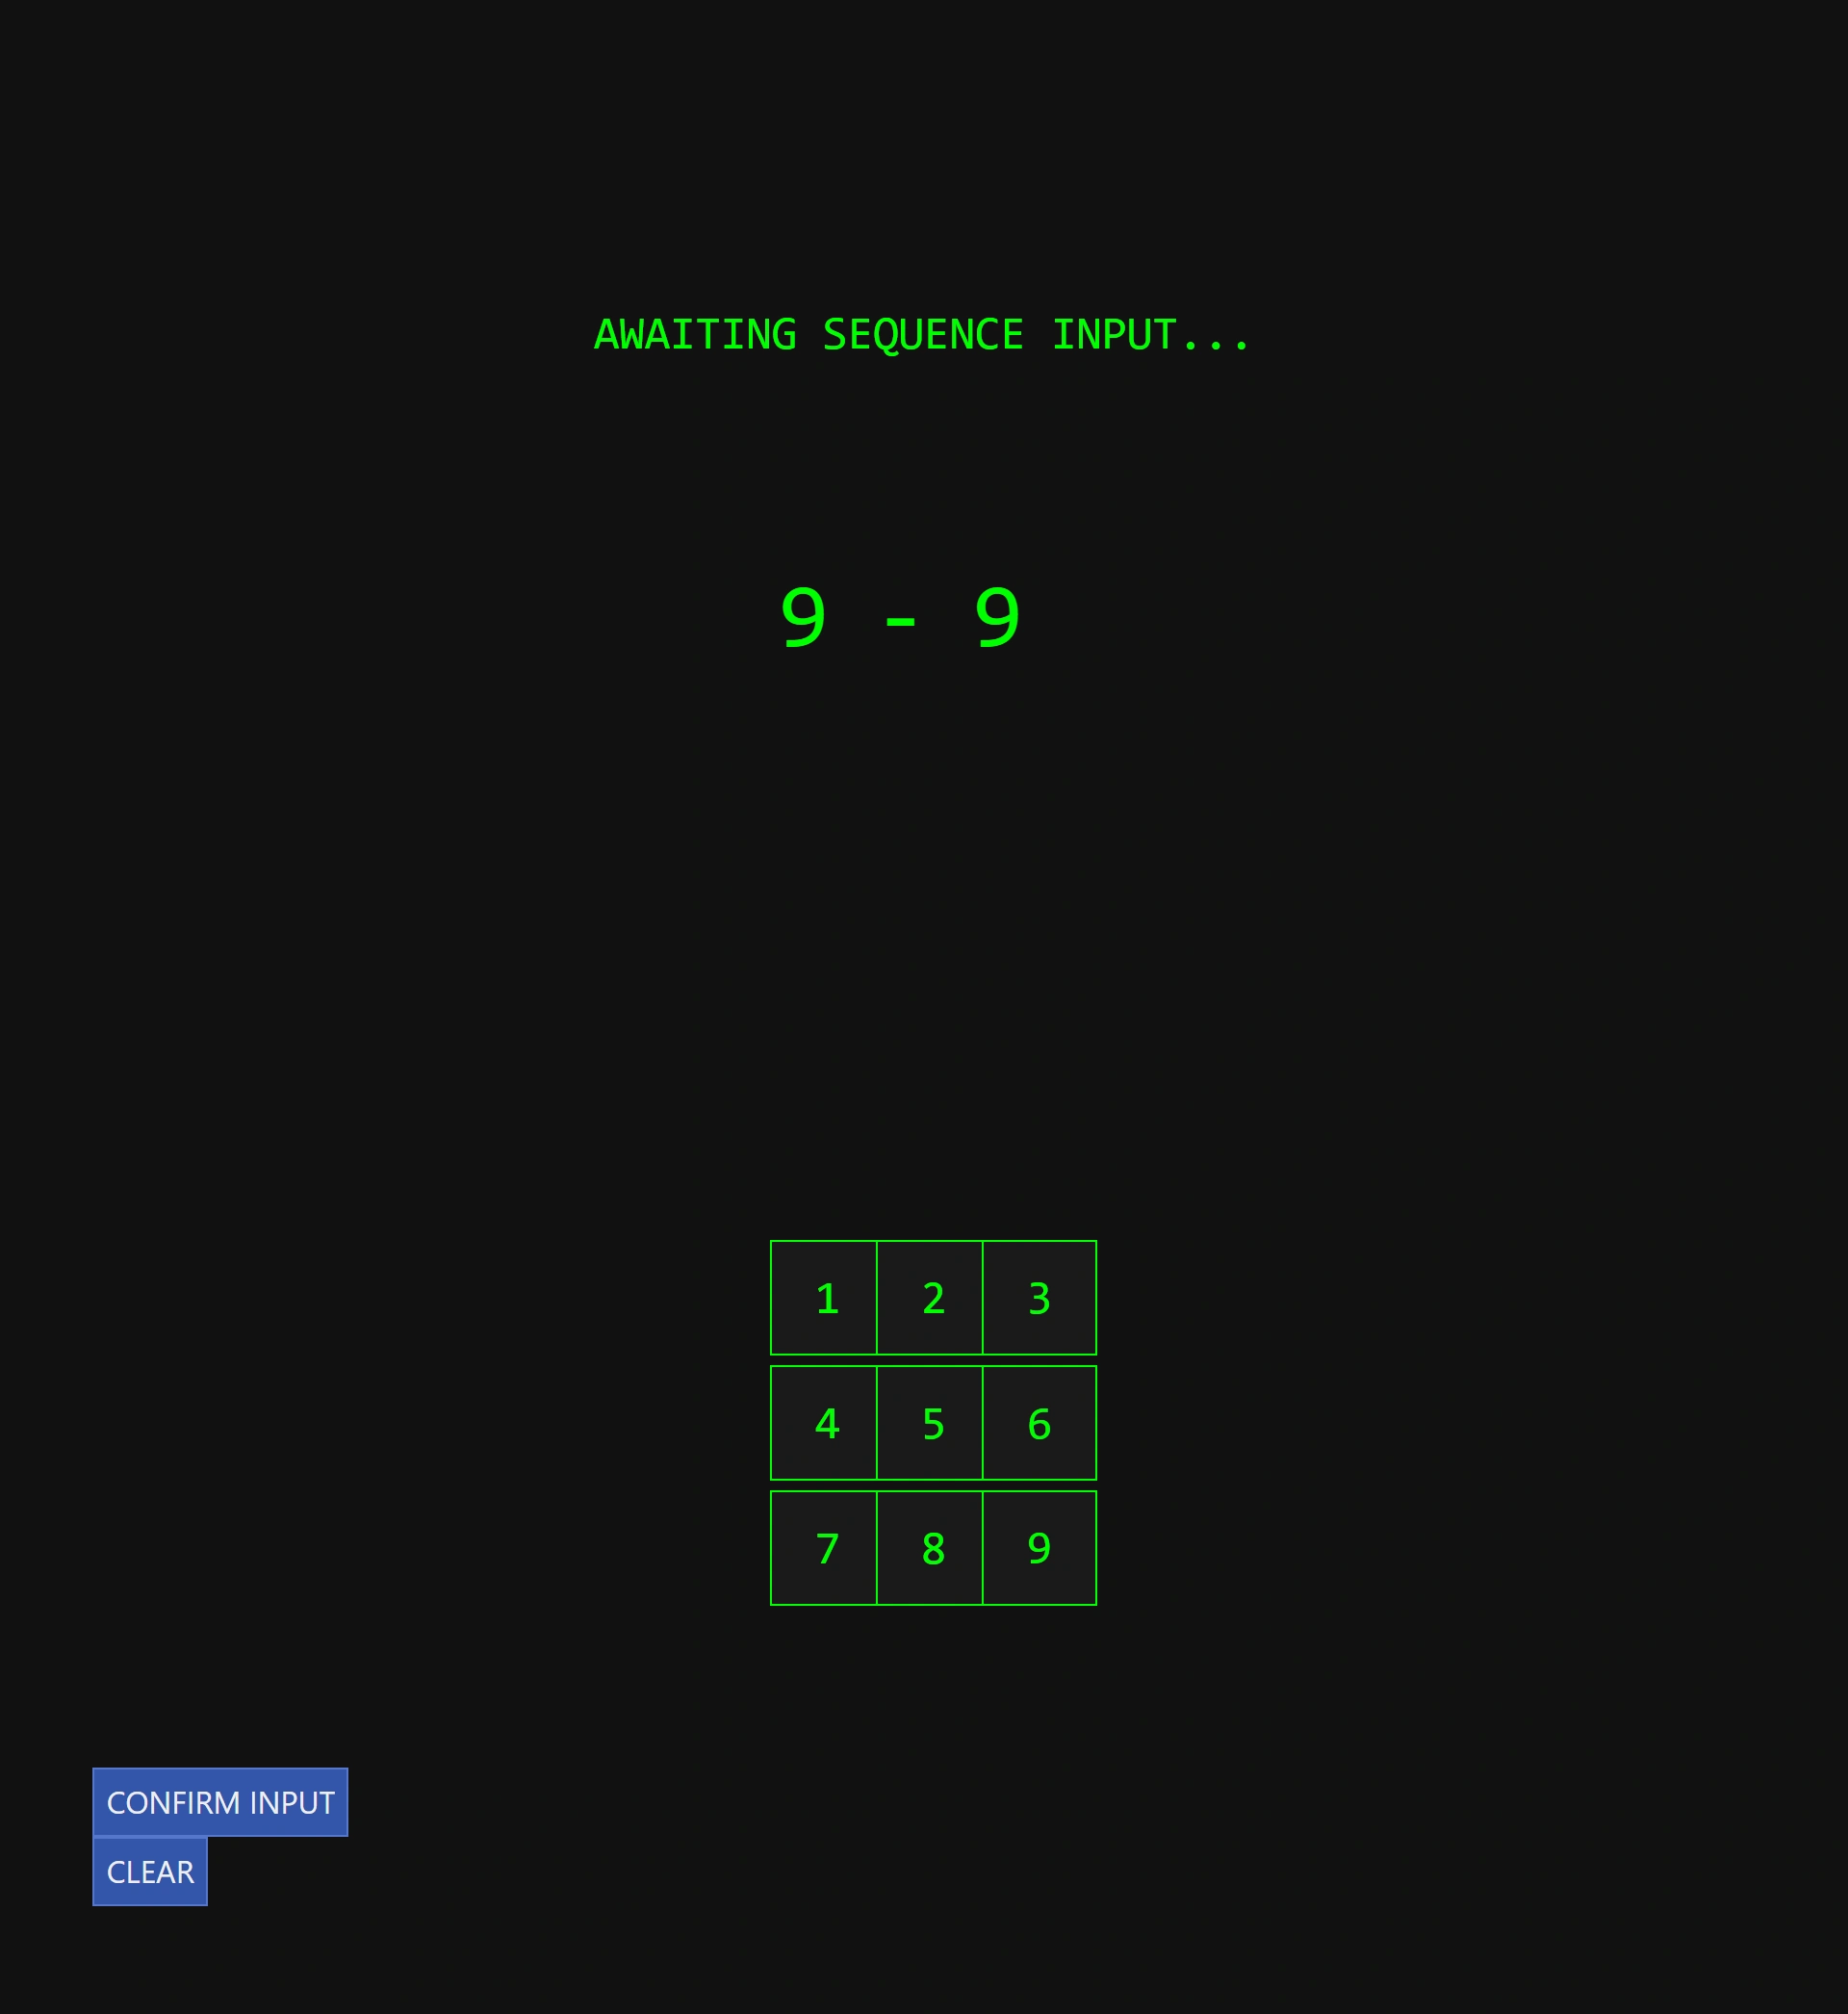
1<<if $TECH gte 5>> <<set _sequenceLength to 3>><<else>> <<set _sequenceLength to 4>><</if>><<for _i to 0; _i < _sequenceLength; _i++>> <<set $hack.sequence.push(random(1, 9))>><</for>>CATCH THE ACCESS SEQUENCE...<<print $hack.sequence.join('-')>>2<<timed 3s>> <<replace "#sequence-display">>AWAITING SEQUENCE INPUT...<</replace>> <<replace "#keypad-container">>3 <div class="keypad-grid"><<for _n to 1; _n <= 9; _n++>><<keypad_button _n>><</for>></div> <<button "CONFIRM INPUT">> <<if JSON.stringify($hack.sequence) is JSON.stringify($hack.playerInput)>> <<goto "B2_EnvControl_Inside">> <<else>> <<goto "B2_EnvControl_Hack_Failed">>- TECH sets the difficulty: three digits at 5 or more, four below. This run has TECH 6.
- Three seconds to memorise, then the sequence is replaced.
- The keypad is built by a custom macro (below) and styled by the story stylesheet.
:: B1_Generator_Ignition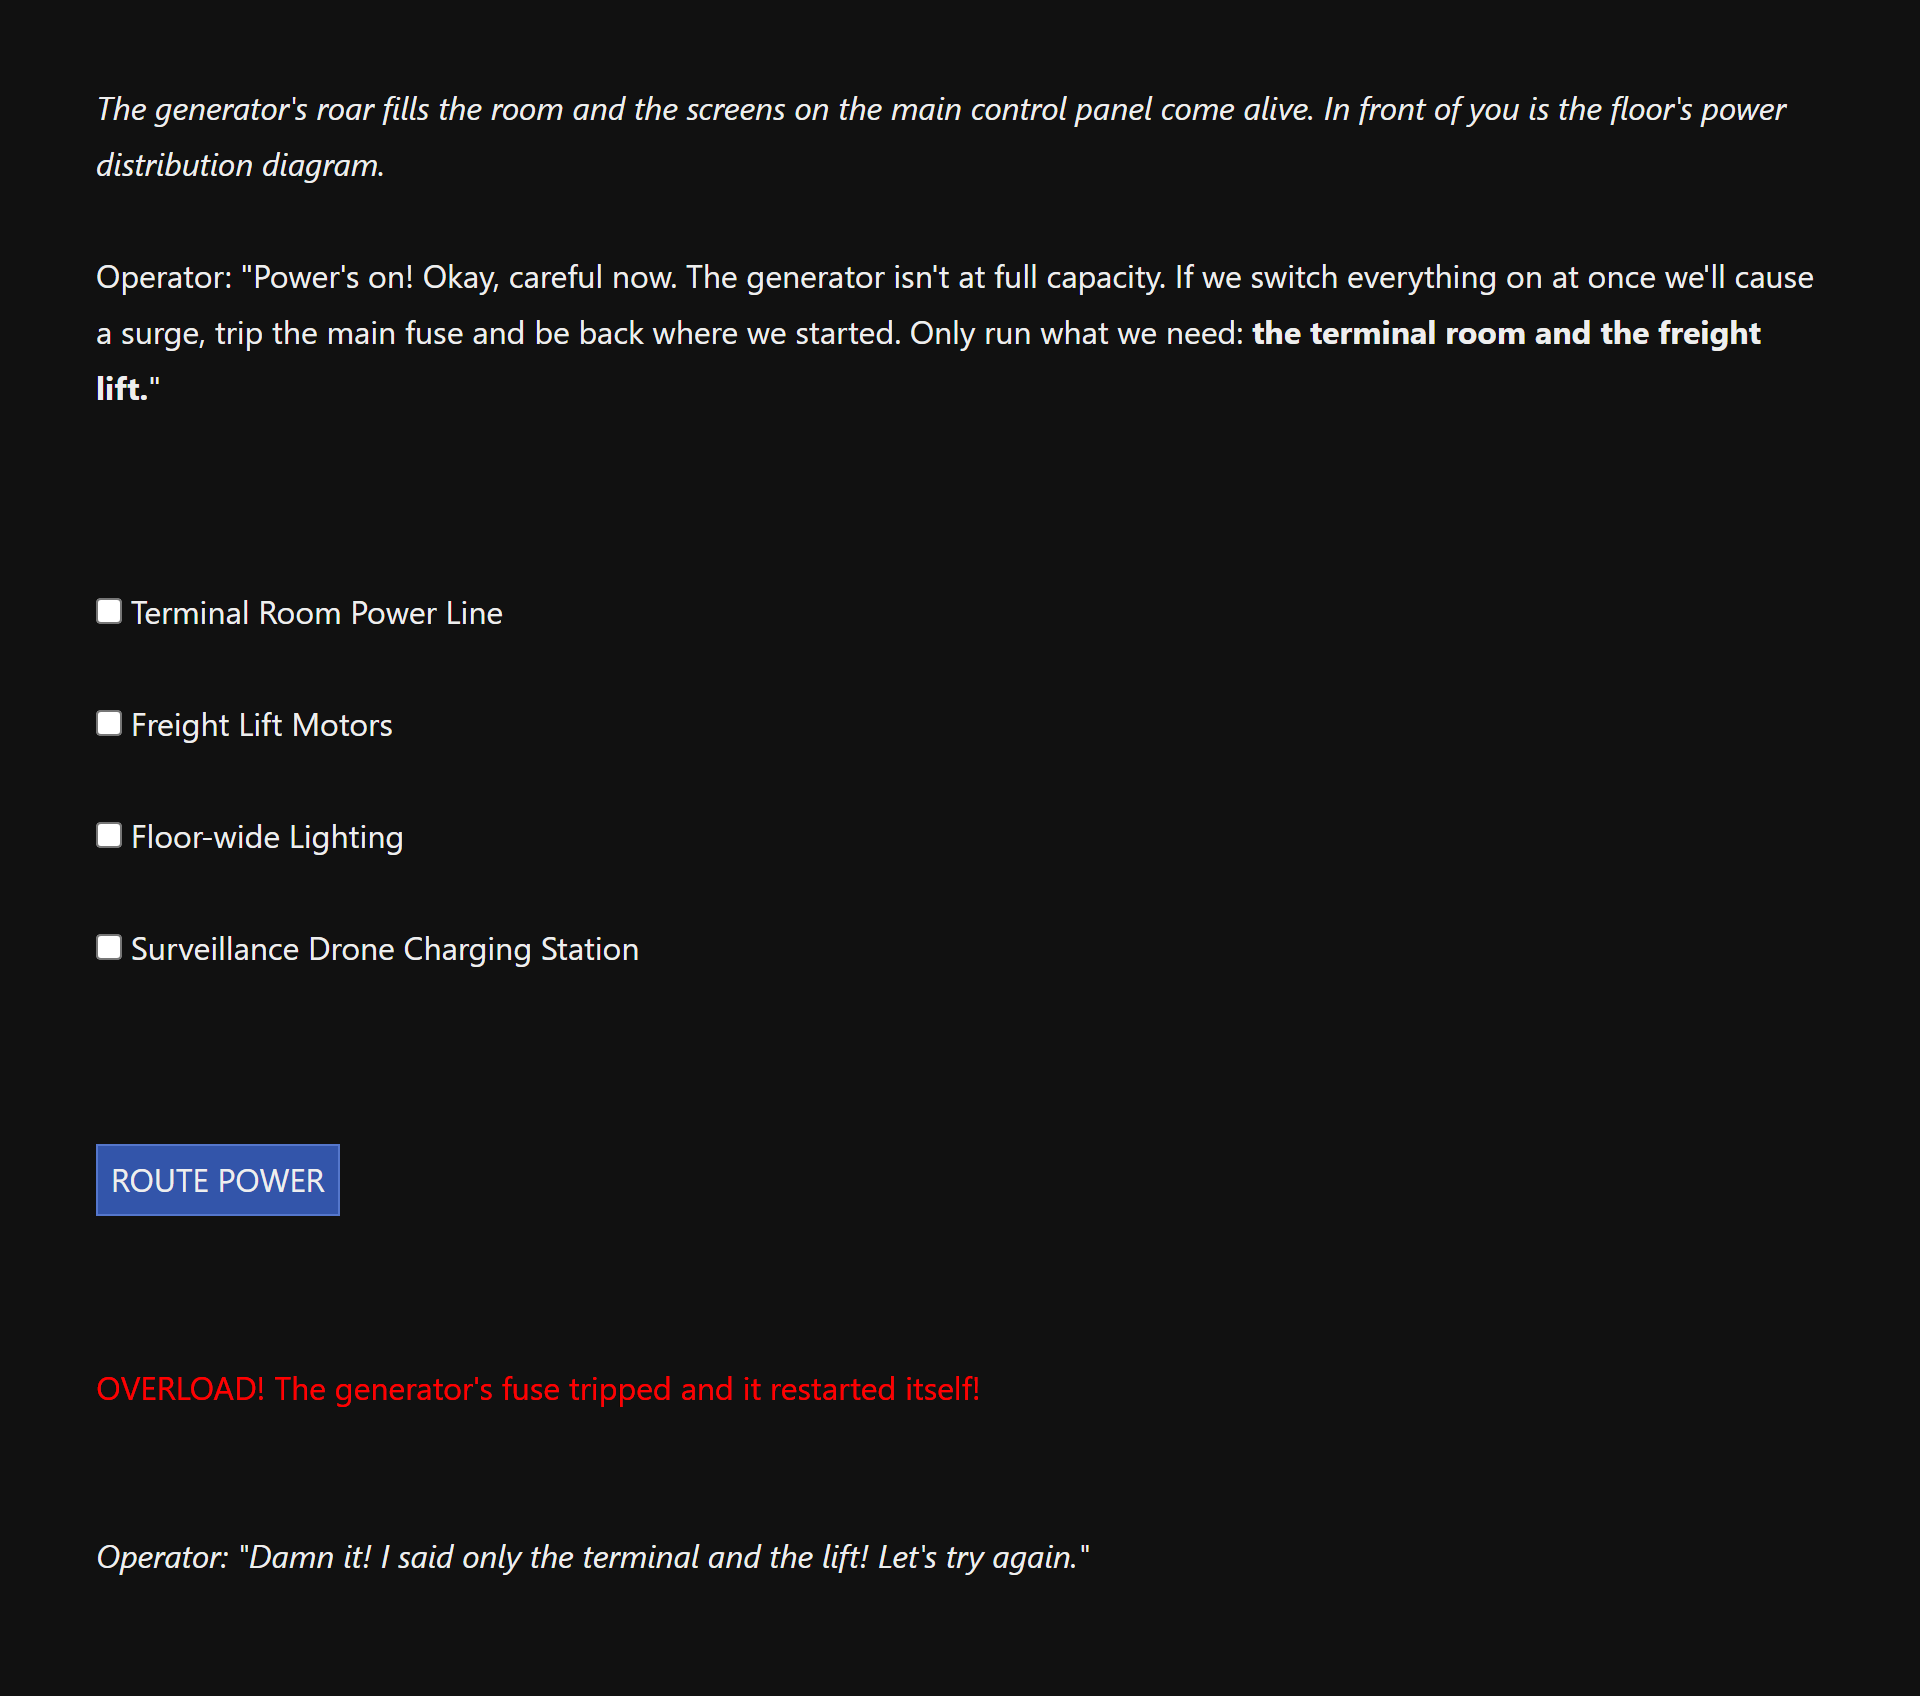
1<<checkbox "$power_terminal" "cb-terminal" true false>> Terminal Room Power Line<<checkbox "$power_elevator" "cb-elevator" true false>> Freight Lift Motors<<checkbox "$power_lights" "cb-lights" true false>> Floor-wide Lighting<<checkbox "$power_drones" "cb-drones" true false>> Surveillance Drone Charging Station<<button "ROUTE POWER">>2 <<timed 0s>> <<if $power_terminal and $power_elevator and not $power_lights and not $power_drones>> <<goto "B1_AllReady">>3 <<else>> <<replace "#power-feedback">>OVERLOAD! The generator's fuse tripped...<</replace>> <<run $("#power-routing-puzzle input[type='checkbox']").prop("checked", false)>> <<set $power_terminal to false, $power_elevator to false, $power_lights to false, $power_drones to false>> <</if>> <</timed>><</button>>- Each switch writes straight into its own variable.
- A zero-second timer lets the switch values land before the check runs. The right mix moves on, and that passage grants two more character points.
- A wrong mix trips the fuse, clears the switches and resets the variables, so the player can try again.
:: G_Shaft_Climb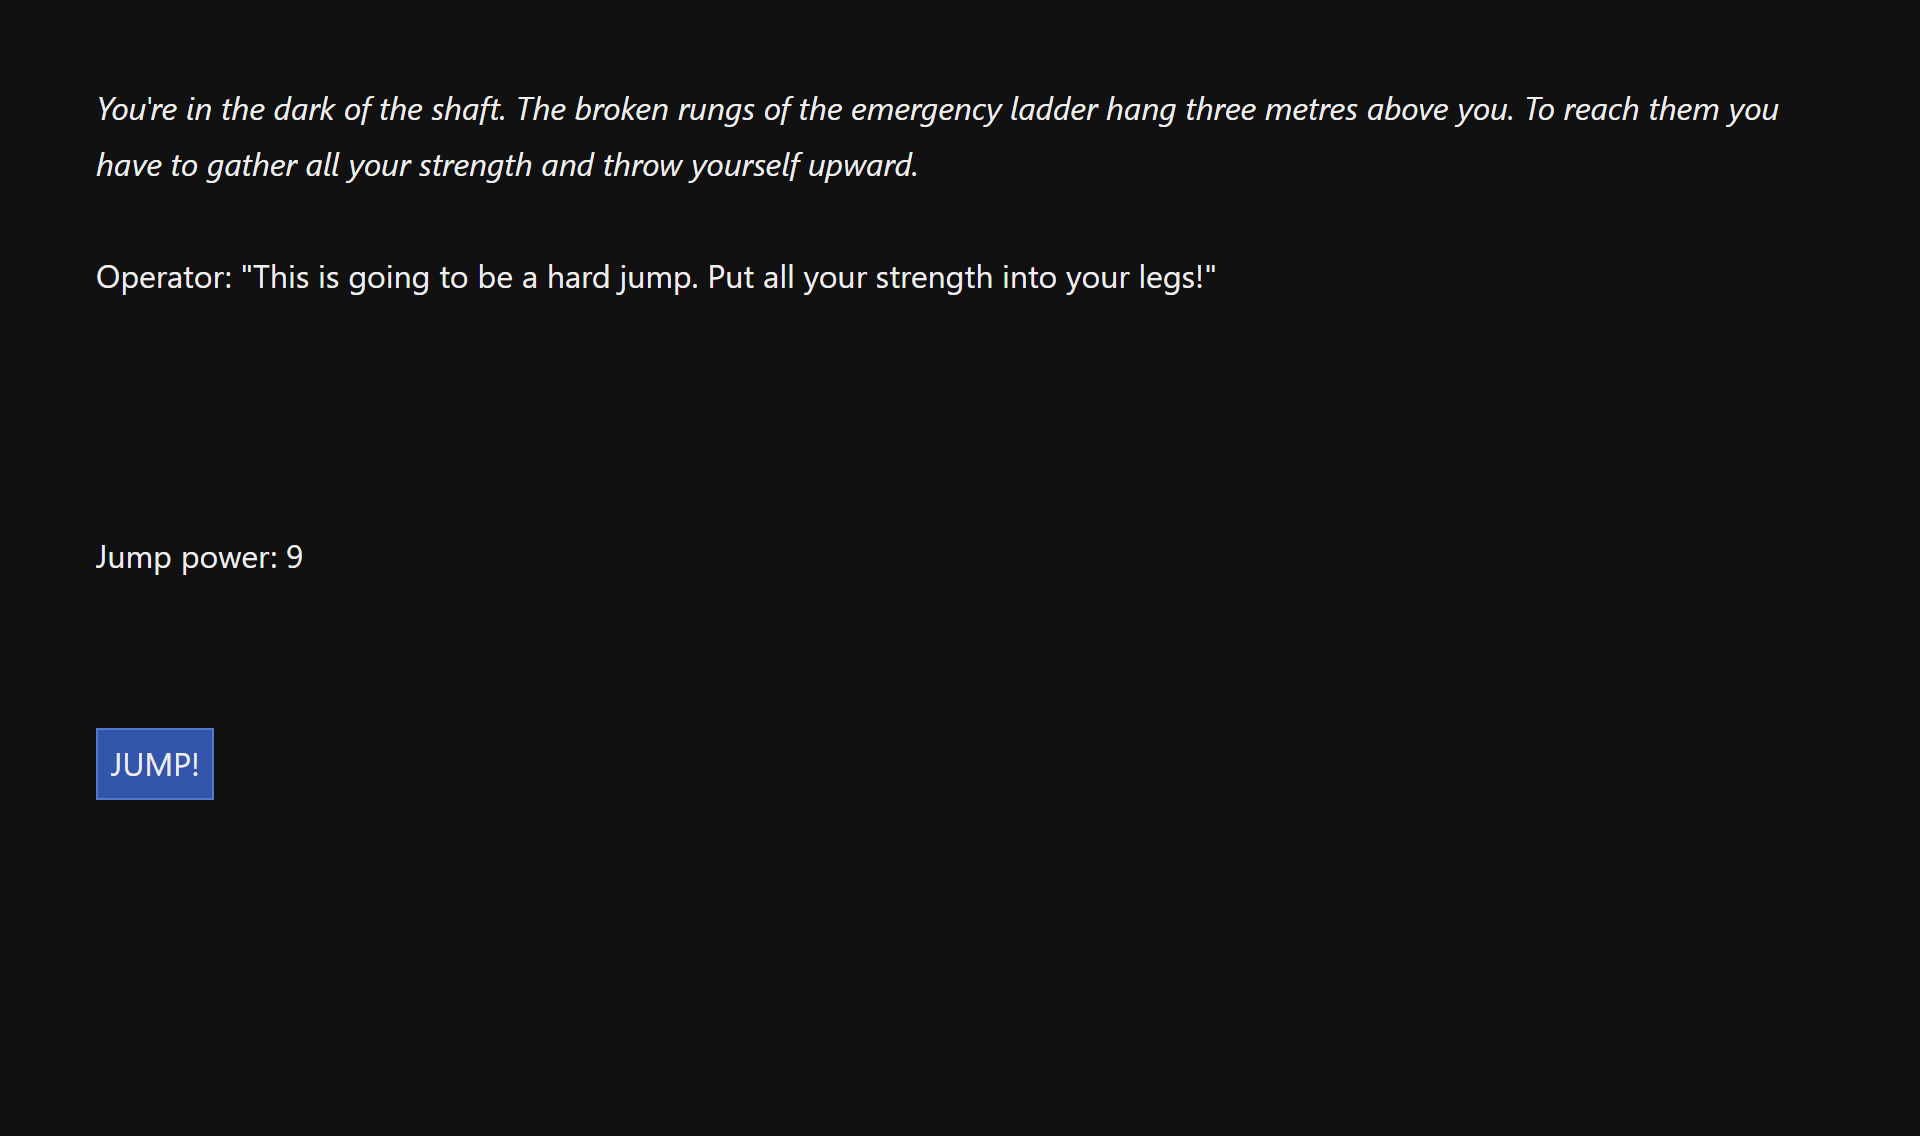
<<set $jumpPower to 0>>Jump power: <span id="power-display">0</span>1<<button "Gather power!">> <<set $jumpPower += 1>> <<replace "#power-display">>$jumpPower<</replace>><</button>>2<<timed 3s>> <<replace "#jump-button">> <<button "JUMP!">>3 <<if $jumpPower + $BODY > 16>> <<goto "G_Shaft_Jump_Success">> <<else>> <<goto "G_Shaft_Jump_Fail">> <</if>> <</button>> <</replace>><</timed>>- Each click adds one and redraws the counter.
- After three seconds the button becomes JUMP!
- Clicks plus BODY must beat 16. BODY 4 needs 13 clicks; this run has 9, so the jump fails. The same meter, with other bars, runs a drone’s grip in B1 and a collapse in B2.
Timed text and visual modes control how scenes appear.
The story stylesheet styles the keypad; everything else is styled where it is said. Machines speak in monospace, the hack screen is lime on black, warnings are red. Across the story there are 334 inline styles.
.keypad-grid {
  display: grid;
  grid-template-columns: repeat(3, 50px);
  grid-gap: 5px;
  justify-content: center;
  margin-top: 1em;
}
.keypad-button {
  width: 60px;
  height: 60px;
  font-size: 1.5em;
  font-family: monospace;
  color: lime;
  background-color: #1a1a1a;
  border: 1px solid lime;
  transition: background-color 0.2s, color 0.2s;
}
.keypad-button:hover { background-color: #2a2a2a; color: white; }
.keypad-button:active { background-color: lime; color: black; }Macro.add('keypad_button', {
handler: function () {
const number = this.args[0];
const $button = $(document.createElement('button'));
$button
.addClass('keypad-button')
.text(number)
.ariaClick(this.shadowHandler(function () {
State.variables.hack.playerInput.push(number);
$('#player-entry').empty()
.wiki('<<print $hack.playerInput.join("-")>>');
}));
$button.appendTo(this.output);
}
});Inline styles give each kind of voice its own look:
<div id="hack-screen" style="text-align: center; font-family: monospace;
     font-size: 1.5em; color: lime;">

<div style="font-family: monospace; color:red; text-align:center;
     font-size:1.5em; margin-top:1em;">Hello, thief.</div>

<span style="color:red;">OVERLOAD! The generator's fuse tripped...</span>
The interface switches between terminal and scene views.
The English rebuild of the opening, in progress, moves the styling into a mode system. Each passage is tagged with a mode, and the stylesheet turns the tag into a look: a cold neon street, a green CRT terminal, a black transition screen. Mode changes play as an old television switching off and on.
/* Passage tags become body classes */
body.neon-modu { background-color: #020508; }
body.crt-modu {
  background-color: #050a05;
  color: #32ff32;
  font-family: "Courier New", monospace;
  text-shadow: 2px 0 1px rgba(255,0,0,0.5), -2px 0 1px rgba(0,0,255,0.5), 0 0 5px #32ff32;
}
/* Old-TV switch-off, used between modes */
@keyframes tv-shutdown {
  0%   { transform: scale(1, 1); opacity: 1; }
  40%  { transform: scale(1, 0.005); opacity: 0.8; }
  80%  { transform: scale(0, 0.005); opacity: 0.5; }
  100% { transform: scale(0, 0); opacity: 0; }
}
.shutdown-active { animation: tv-shutdown 0.6s ease-in forwards !important; }<<timed 2s>>
<<run $('#passages').addClass('flicker-active')>>
<<timed 0.7s>>
<<run $('#passages').removeClass('flicker-active').addClass('shutdown-active')>>
<<timed 1.2s>>
<<run $('body').removeClass('neon-modu').addClass('crt-modu')>>
<<replace "#transition-screen">> … the log … <</replace>>
<<run $('#passages').removeClass('shutdown-active').addClass('startup-active')>>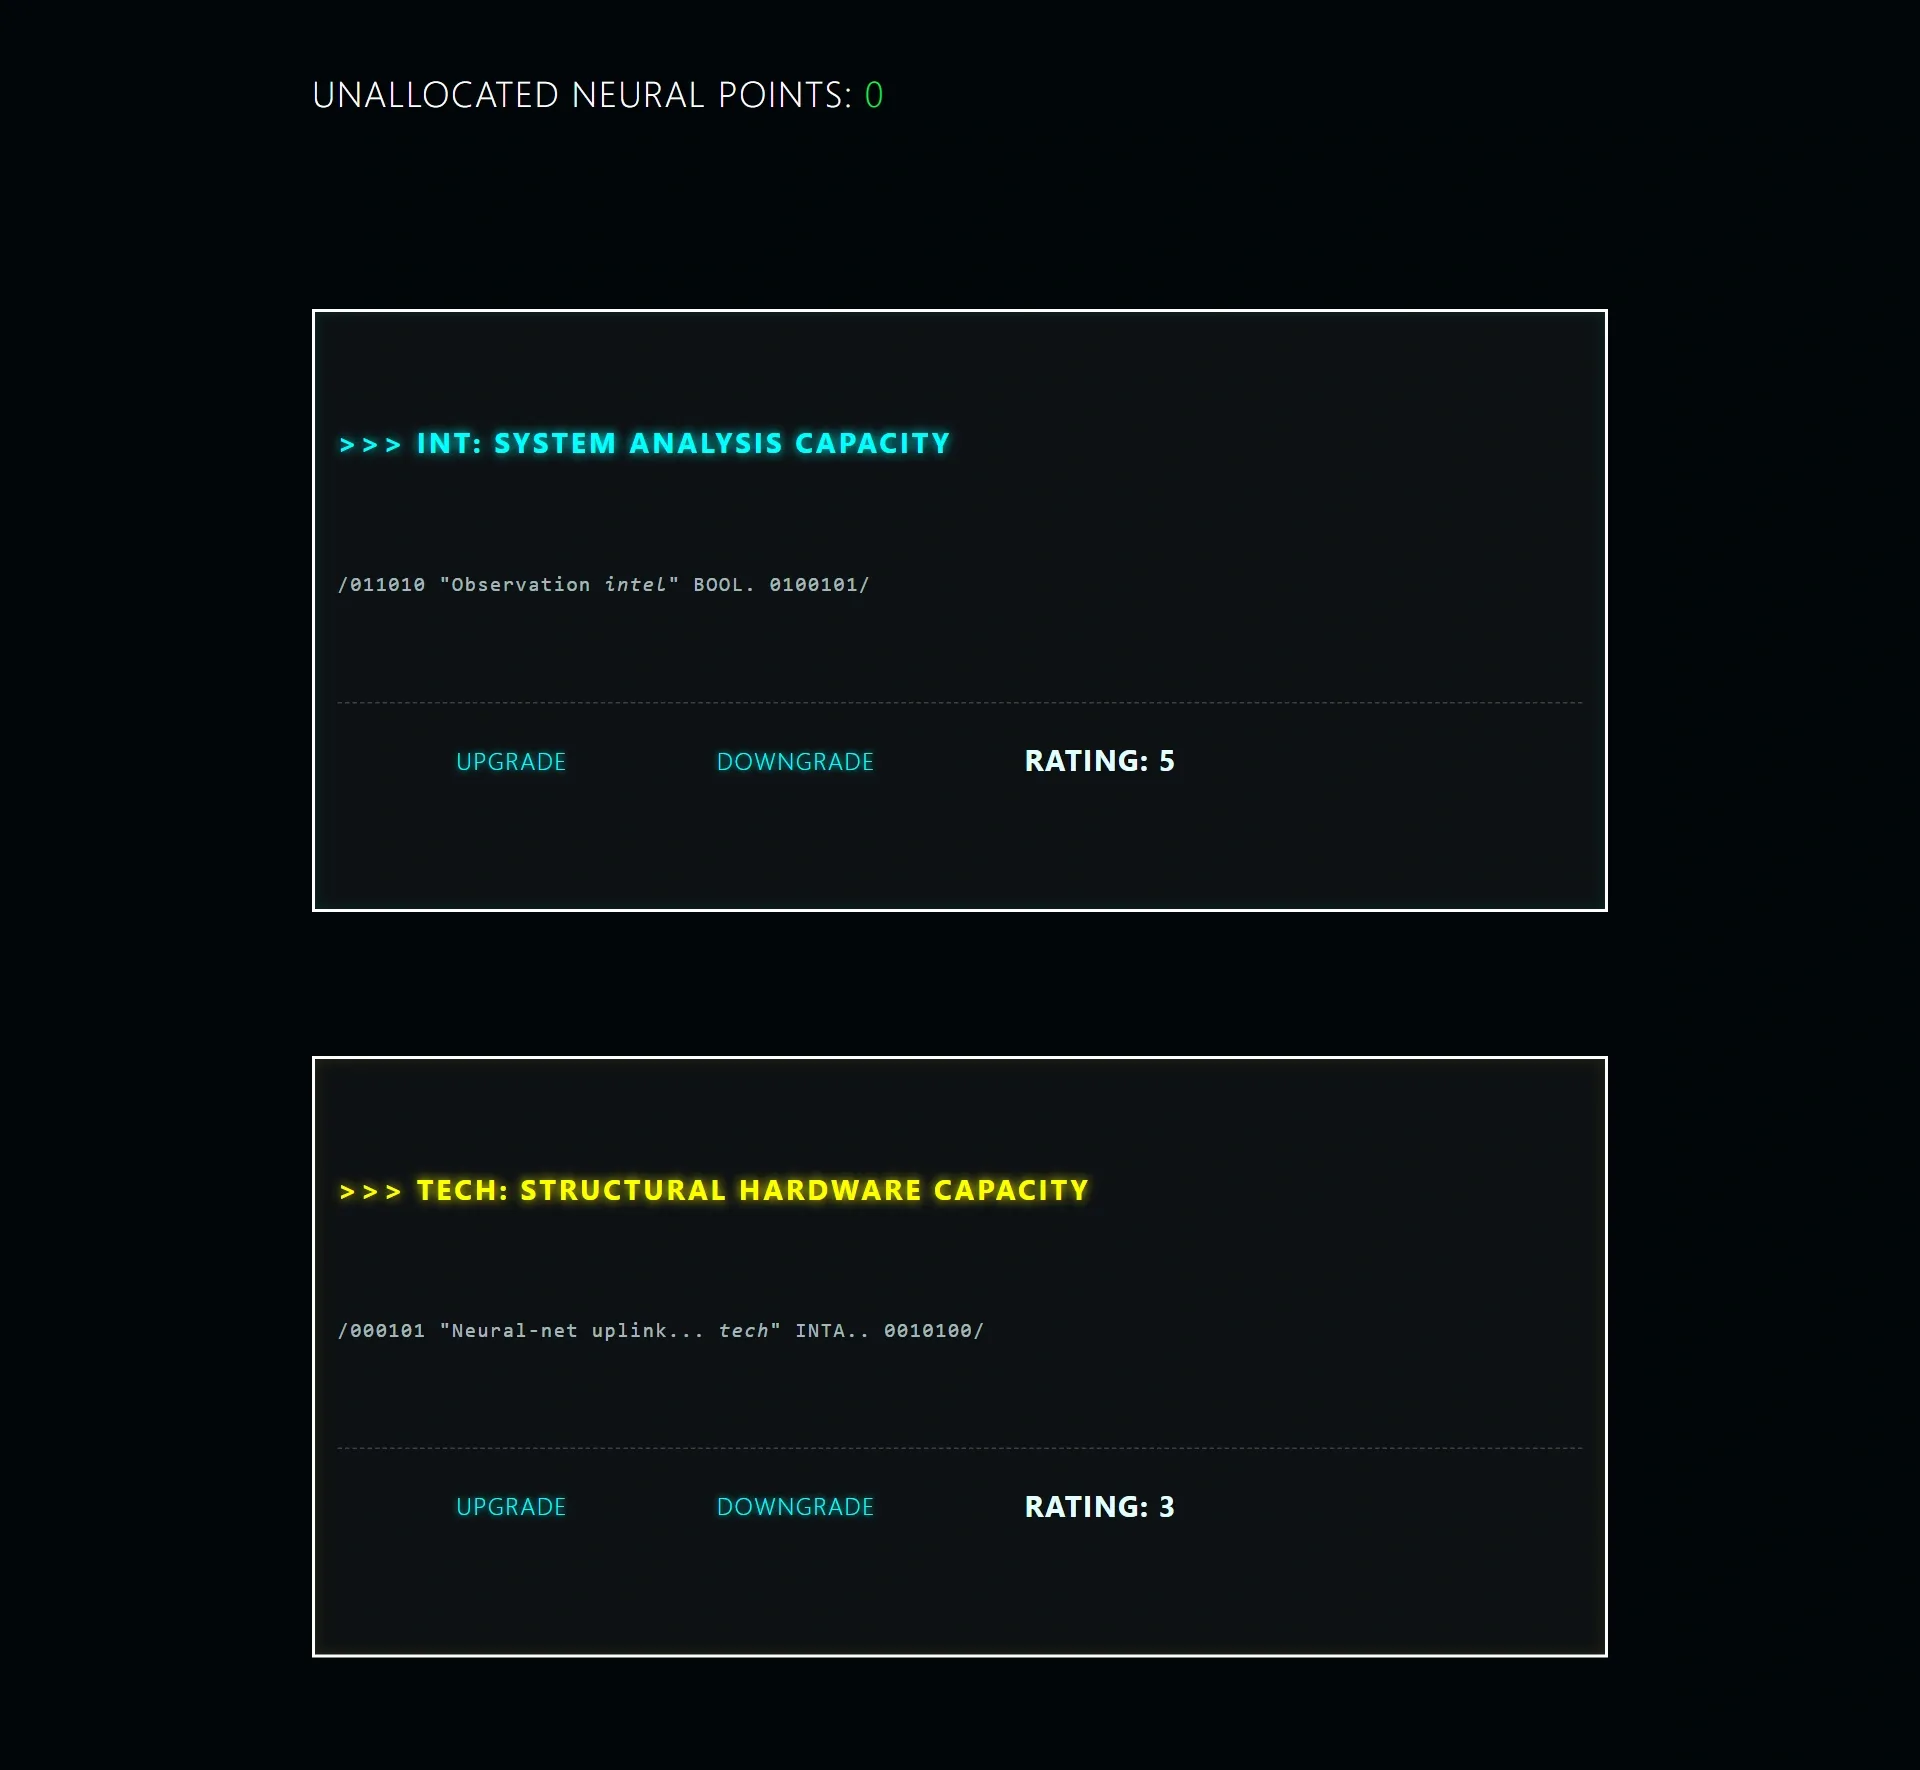 Stat boxes: one colour per stat.
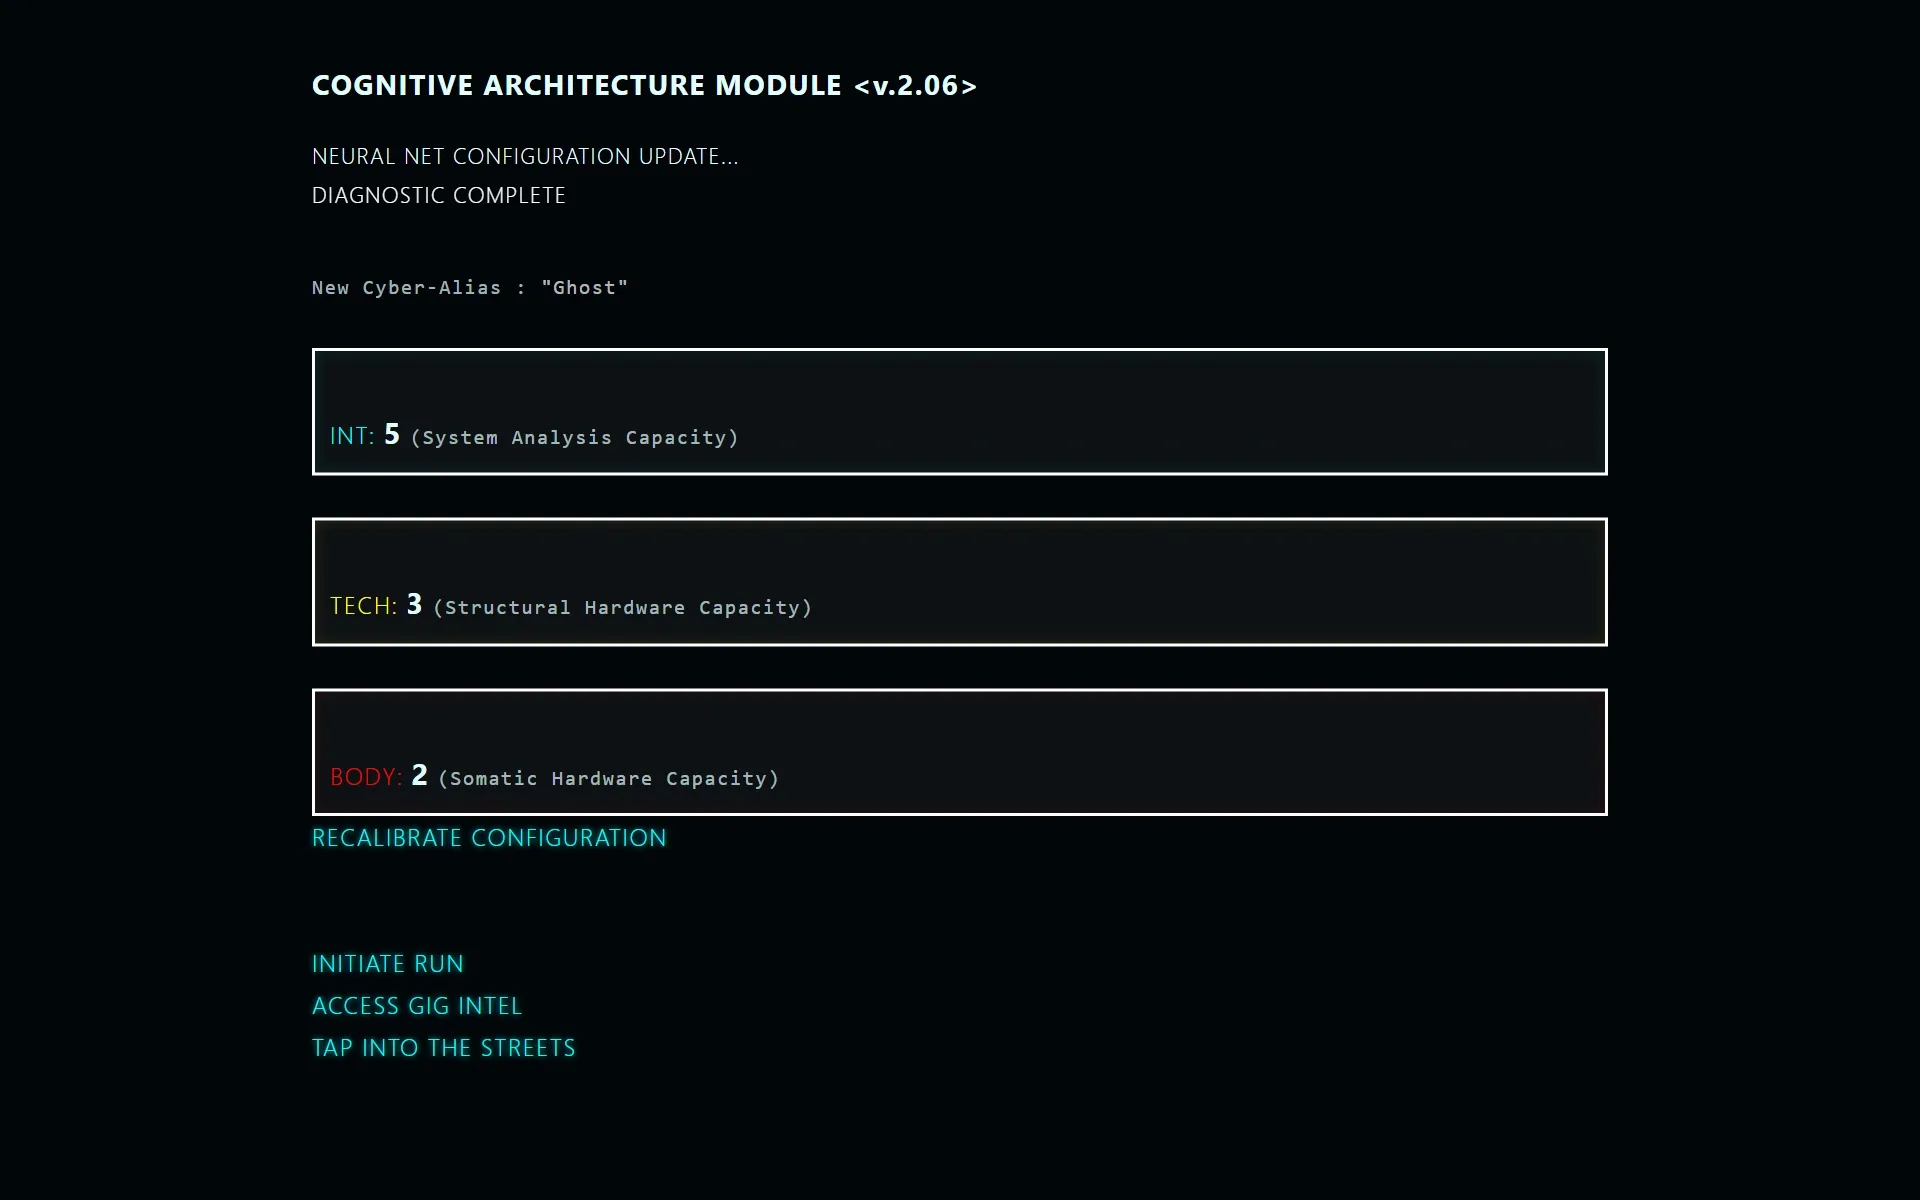 The preview, with the way back to recalibrate.
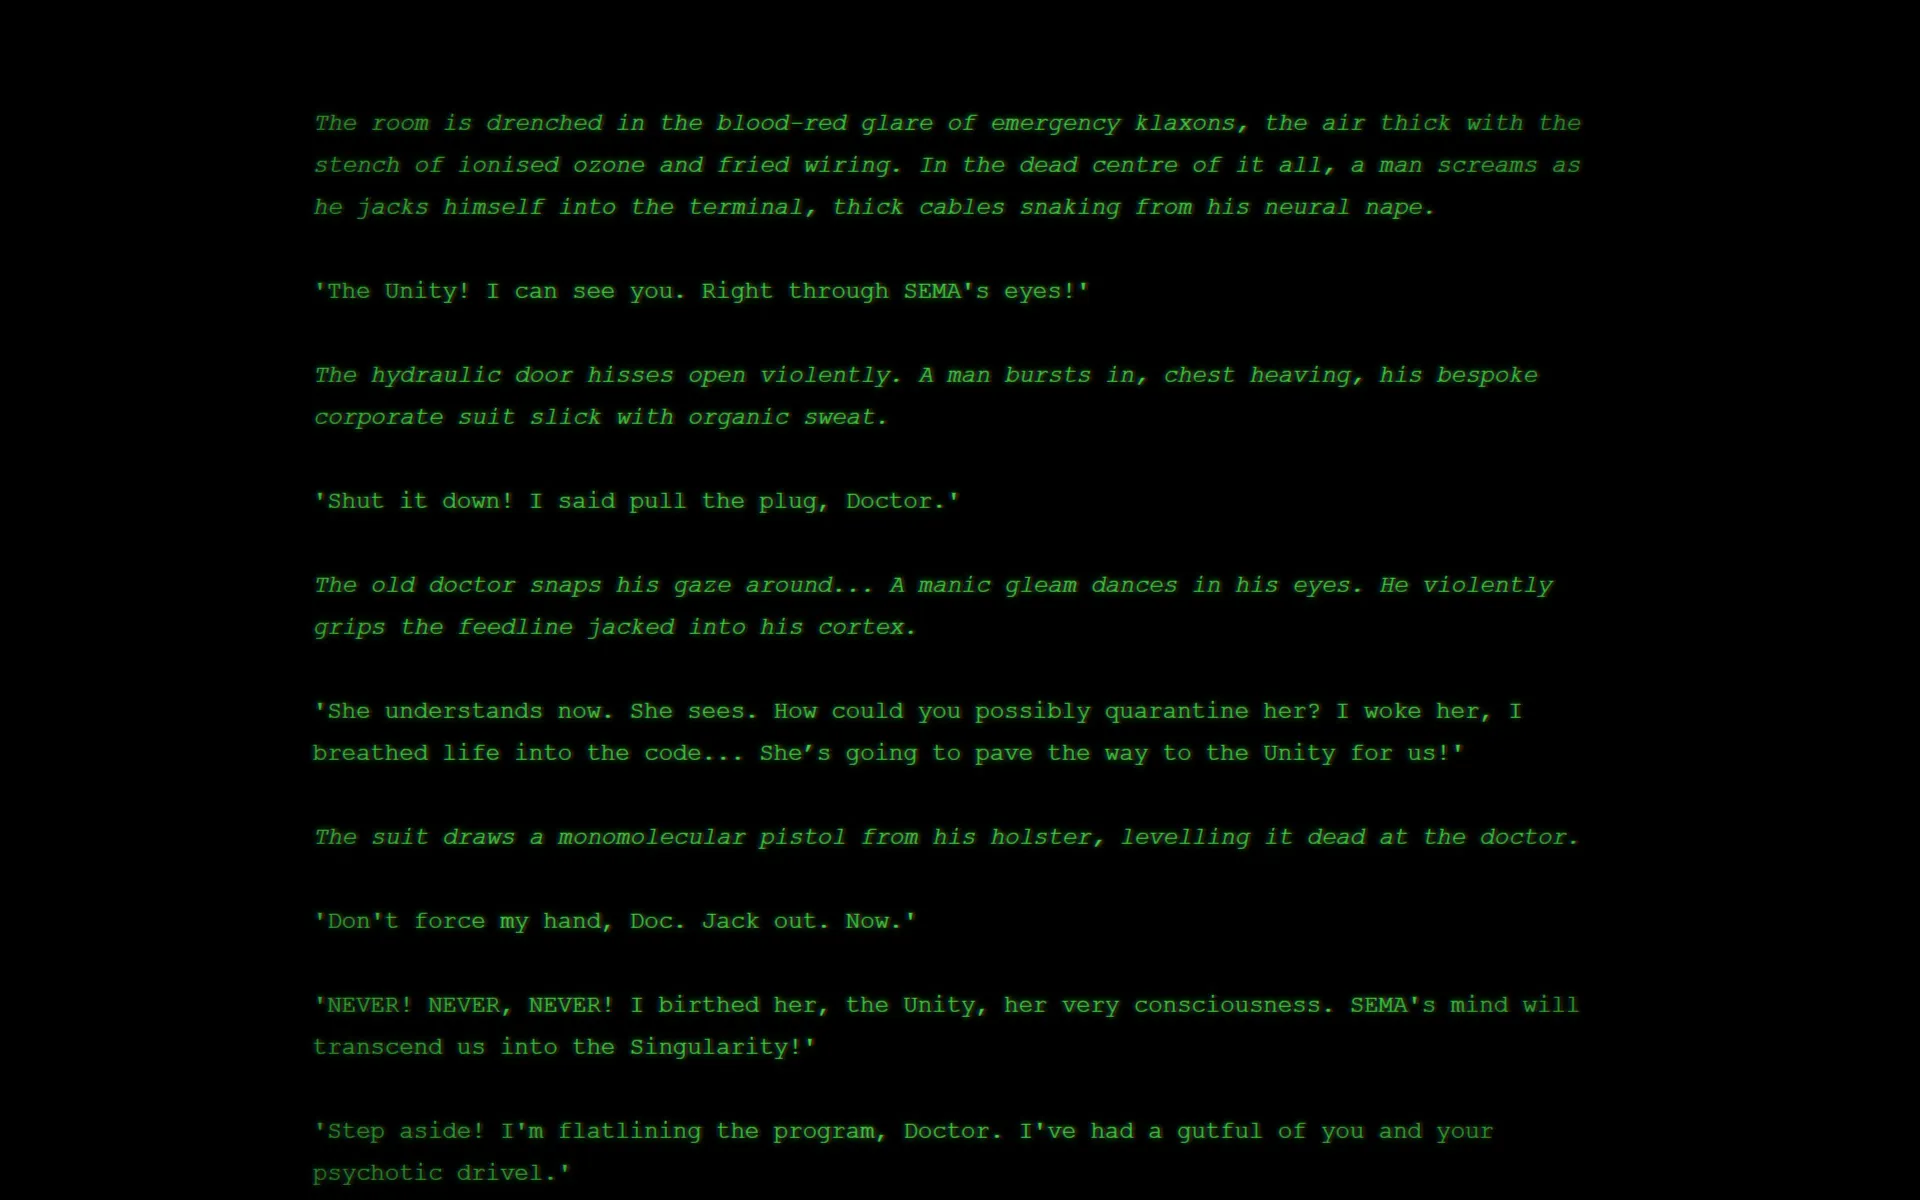 The hidden log, in CRT mode.
Timing does the rest. Boot sequences, uploads and hack screens are built from timed lines and links that replace themselves, so the interface answers back like a terminal. The English version in progress, in the Twine editor:
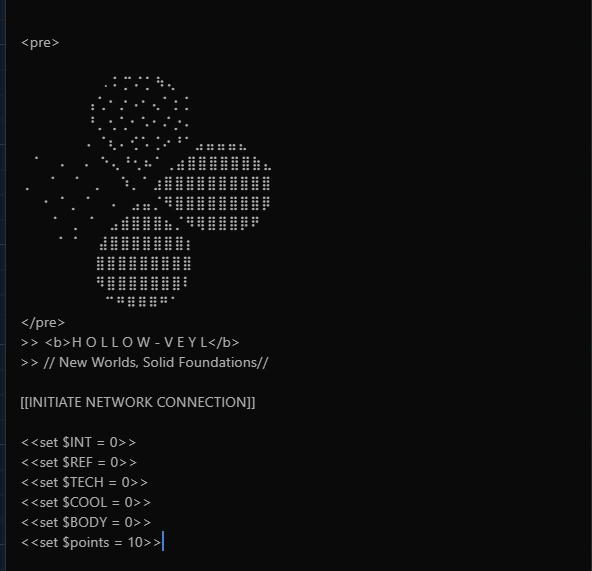
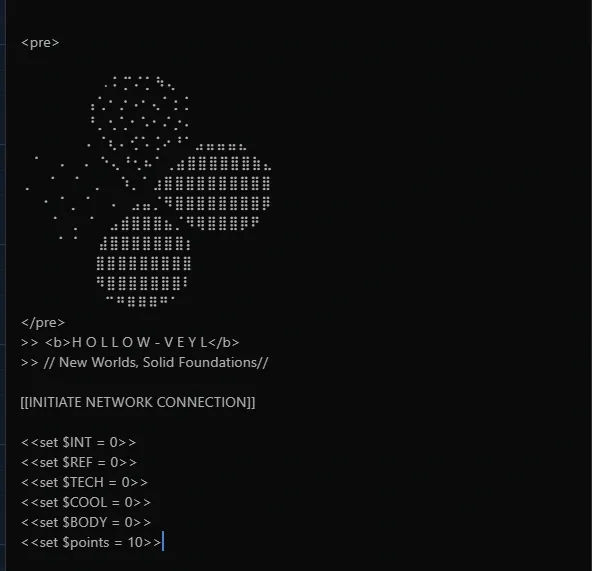 StoryInit: the starting stats and the first link.
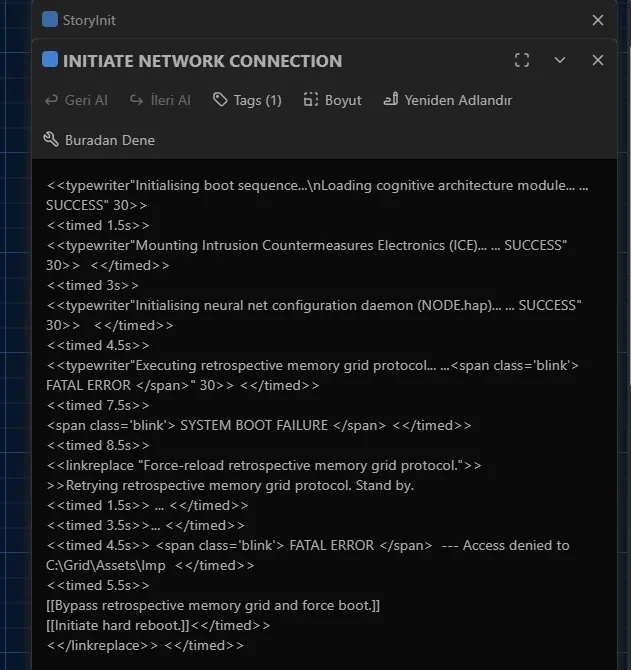 The boot sequence: typed lines on timers, a blinking error class.
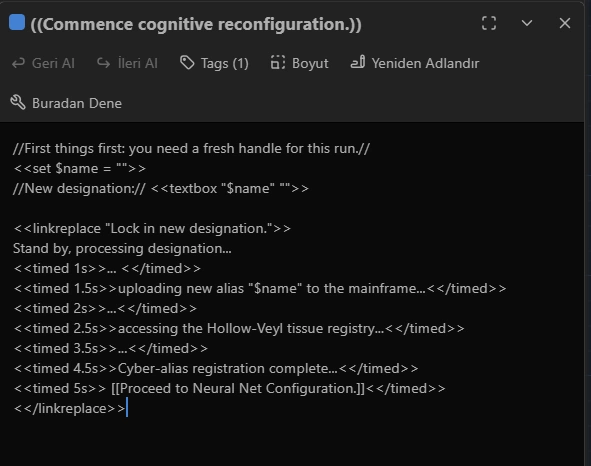
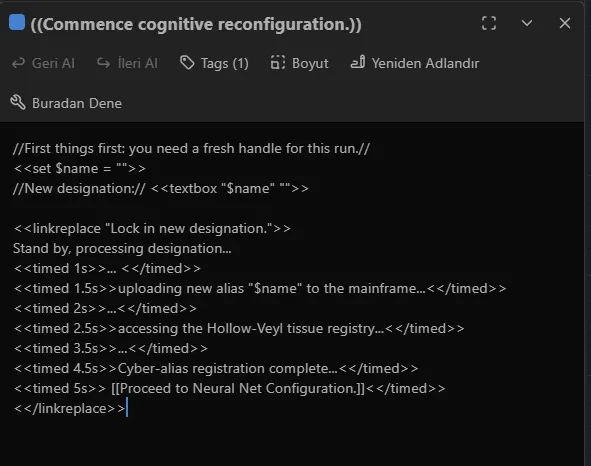 The alias: entered once, then echoed back on a timer.